[ad_1]
Kale is an easy-to-grow, cold-hardy leafy green that can be planted in spring or fall. Learn how to grow kale from seed to harvest, including soil preparation, planting, and maintenance tips.
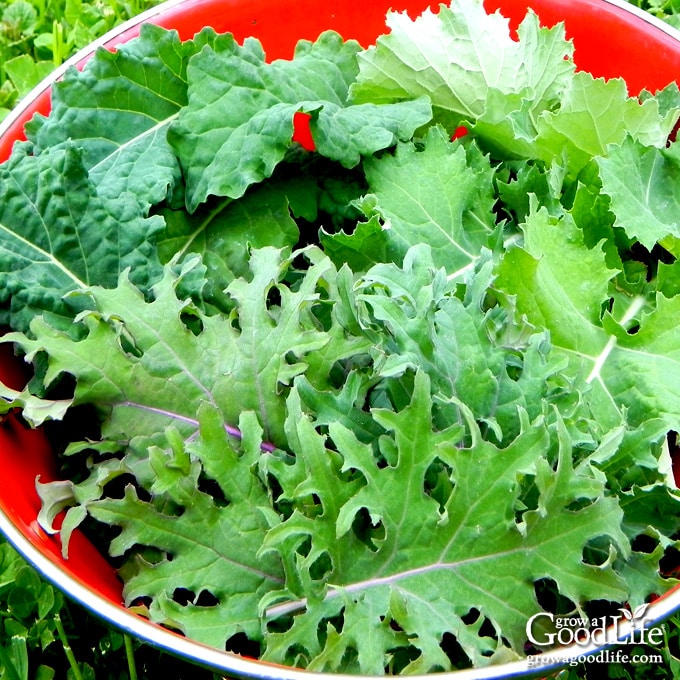
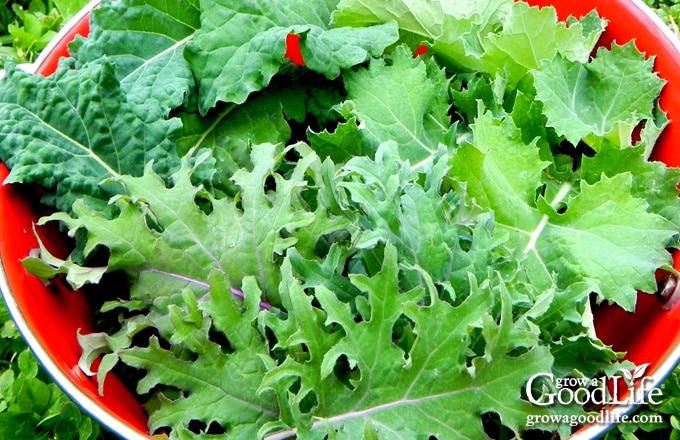
Kale is a leafy green vegetable that has gained a lot of popularity in recent years thanks to its high nutritional value and versatility in cooking. So whether you’re a fan of kale salads, smoothies, or kale chips, growing your own kale at home can be a rewarding and cost-effective way to enjoy this superfood.
In this guide, we’ll walk you through the process of growing kale, from selecting the right variety to harvesting your crops. So, if you’re ready to start your own kale garden, read on!
About Kale
Kale (Brassica oleracea) is a member of the cabbage family and is closely related to other leafy green brassica vegetables like broccoli, cauliflower, and Brussels sprouts. In fact, kale, cabbage, broccoli, Brussels sprouts, collards, and other leafy green vegetables all originated from the same plant centuries ago. Decades of selective breeding led to the variations in plant appearance and flavor profile, giving us a wide variety of healthy cruciferous vegetables to enjoy.
Kale has a rich history dating back to ancient times. Its origins can be traced back to the eastern Mediterranean and Asia Minor, where it has been cultivated for thousands of years. It was a staple crop in ancient Greece and Rome and was valued for its nutritional and medicinal properties. In the Middle Ages, kale was widely grown throughout Europe and was considered a vital food source during times of famine.
Today, kale is enjoyed all over the world and is commonly used in a variety of dishes, from salads and smoothies to soups and stir-fries. One of the reasons why kale has become so popular in recent years is its high nutritional value. Kale is considered a superfood because of its high nutritional value, antioxidant content, and low caloric content. In addition, it contains vitamins A, K, B6, and C, calcium, potassium, copper, and manganese.
In addition to its nutritional benefits, kale has also been linked to a range of health benefits, including reduced inflammation, improved digestion, and lower cholesterol levels. So it’s no wonder why kale has become a popular superfood and a staple ingredient in many healthy diets.
Kale Varieties to Consider Growing
When it comes to growing kale, there are several types to choose from, each with its unique appearance and flavor. Here are some of the most popular kale varieties to consider growing in your garden:
Curly Leaf Kale
This is the most common type of kale and is easily recognizable by its ruffled, curly leaves. It has a spicy, peppery flavor that can be quite strong, especially when eaten raw. Curly leaf kale is perfect for adding texture and flavor to salads and other dishes.
Varieties of curly-leaf kale include:
- Darkibor produces dark green, densely curled leaves with an excellent flavor. This tall variety grows up to 24 to 36 inches and provides high yields of extra curly greens. One of the advantages of this variety is that it resists yellowing, and the vigorous plants can hold well into cold weather, making it suitable for overwintering production in Southern climates.
- Dwarf Green Curled is a compact and bushy variety of curly-leaf kale. It has dark green, ruffled leaves that are frilly and tightly curled, giving the plant a decorative appearance. The plant is typically compact and grows to a height of around 18 inches, making it a good choice for container gardening or small garden spaces.
- Redbor is a stunning variety with deep purple-red leaves and curly foliage. The leaves grow upright and have a mildly bitter taste. Redbor kale is perfect for adding color and flavor to salads and other dishes.
Dinosaur Kale
Dinosaur kale, also known as Lacinato kale or Tuscan kale, has narrow, dark green leaves that are wrinkled like dinosaur skin. It has a nutty, earthy flavor that is less bitter than other types of kale. This variety is great for making kale chips, as it crisps up nicely in the oven.
Types of dinosaur kale include:
- Black Magic is a hybrid variety of Lacinato kale with dark green leaves with a slightly savoyed texture. It is known for its sweet and nutty flavor and is often used in Italian cuisine. The plant is typically medium-sized, reaching a height of 18 to 24 inches, and produces heavily.
- Black Jack is another hybrid variety of Lacinato kale with very dark green, heavily puckered leaves. The leaves have a slightly curled edge and a sweet and tender flavor. The plant is typically larger than other Lacinato kale varieties, growing up to 30 inches tall.
- Dazzling Blue is a hardy Lacinato-type that produces dark green leaves with purple midribs giving the plant an eye-catching appearance. The leaf color intensifies in cool temperatures. This variety is ideal for raw kale salads, as the leaves are tender and flavorful. Its unique coloring makes it a great choice for adding visual interest to salads, smoothies, or any dish where kale is used.
- Lacinato, also known as dinosaur kale, this variety has long, narrow, blue-green leaves with a wrinkled texture. It has a sweeter and more delicate flavor than curly leaf kales, and its leaves are often used in soups, stews, and salads.
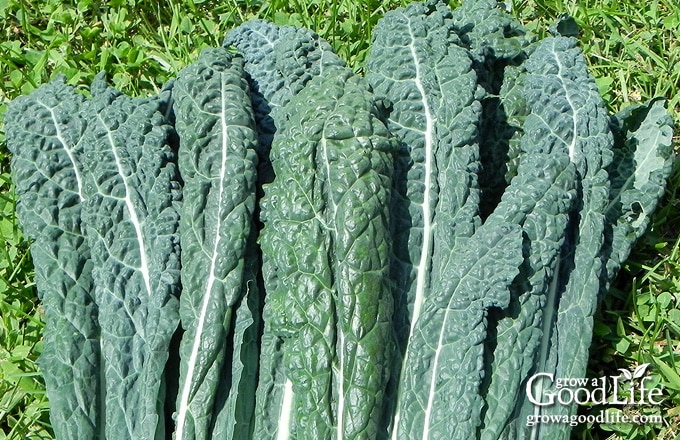
Lacinato kale
Russian Kale
This kale variety has tender, flat, fringed leaves with deeply serrated edges similar in shape to oak leaves. Russian kale has a sweet, peppery flavor that is milder than other types of kale and is perfect for making soups, stews, and other cooked dishes.
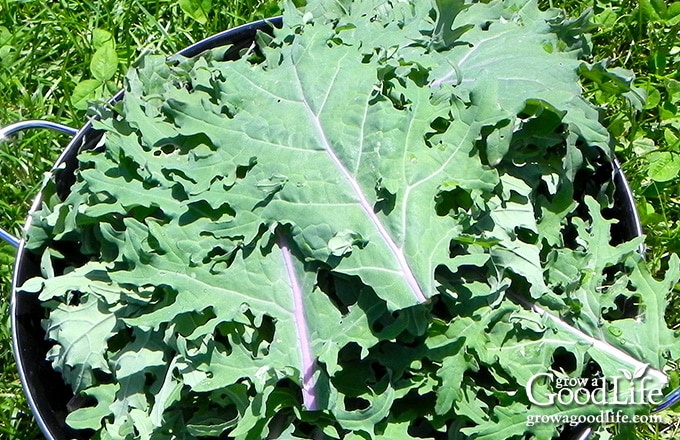
Red Russian kale
Some examples of popular Russian kale varieties include:
- Red Russian is a variety of Russian kale with striking, reddish-purple stems and veining on the leaves. The leaves are blue-green with a slightly red tinge and are deeply lobed, giving them a frilly, ruffled appearance. This variety is easy to grow and can withstand cold temperatures, making it a popular choice for gardeners in cooler climates. The beautiful purplish-red leaf color deepens in cold weather.
- Siberian is a cold-tolerant variety that can withstand frost and snow, making it a good option for fall and winter gardening. Siberian kale has blue-green, slightly curled leaves with a tender texture and a mild, sweet flavor. The leaves of Siberian kale are often smaller and more tender than other kale varieties, making it an excellent option for salads or lightly cooked dishes.
- White Russian has frilly leaves with a prominent white midrib. It is known for its tender leaves and sweet flavor, making it a popular choice for salads and stir-fries. The plant grows up to 2 to 3 feet tall and is quite hardy, tolerating frost and colder temperatures.
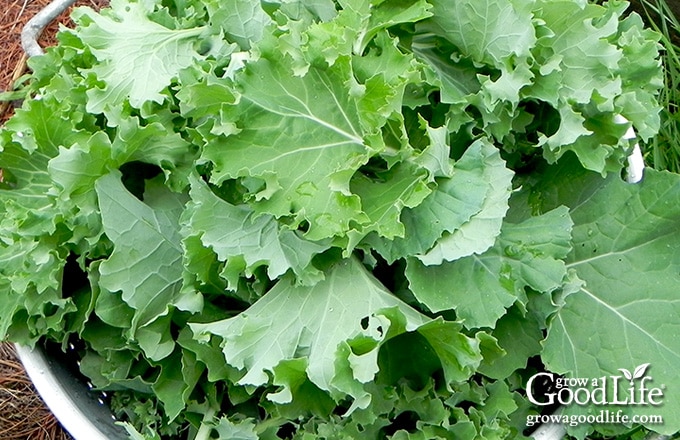
Siberian kale
When selecting which kale variety to grow, consider your personal preferences and how you plan to use the kale. Some types are better suited for raw consumption in salads, while others are better suited for cooking. Regardless of the variety you choose, kale is a versatile and nutritious addition to any garden and diet.
Tips for Growing Kale
Kale is a cool-season and frost-resistant leafy green that is not picky about soil or environmental conditions. It can grow in containers on the patio, raised bed gardens, traditional in-ground gardens, and even indoors under lights or a sunny windowsill.
Growing kale is so easy, and the plants will reward you with many tasty leaves. You can plant kale from seeds started early indoors, direct sowed outside, or purchase transplants from your local garden center.
Here are a few important planting tips to ensure a successful harvest:
When to Grow
Kale is a cool-season vegetable that can be planted in early spring or fall. The time to start seeds is based on your growing area’s last estimated frost date. You can find your last frost date by contacting your local extension office (search for “extension office near me”) or enter your zip code here at PlantMaps.com.
Direct sow seeds in early spring after the danger of heavy frost is past and the soil has warmed to at least 55ºF, or start kale seeds indoors 4 to 6 weeks before your last spring frost date. Then transplant hardened-off seedlings to the garden after your last frost date. For fall planting, sow seeds 8 weeks before your predicted first fall frost of the season. Learn How to Develop a Seed Starting and Planting Schedule.
Choosing the Best Location
Kale grows best in a full sun location but will also tolerate partial shade. Choose a garden spot that receives at least 6 hours of sunlight per day. Kale thrives in fertile, moist, and well-draining soil rich in organic matter with a soil pH range between 6.0 to 7.5.
Additionally, since kale grows best in cooler temperatures planting in a location that stays cool throughout the growing season is ideal. In areas with hot summers, it is best to provide shade during the hottest parts of the day to prevent heat stress on the plants. You can learn more about growing vegetables in shade in this article: Over 30 Crops for Partial Shade.
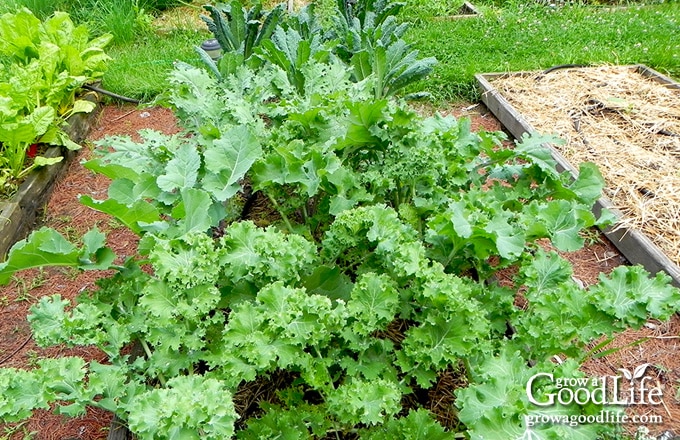
Kale plants growing in a partially shaded garden.
Preparing the Garden Bed
To prepare your garden bed for growing kale, start by clearing away any weeds or debris. Then, add several inches of finished compost, aged manure, or worm castings to improve the soil’s structure, retain moisture, and provide nutrients. Sprinkle a nitrogen-rich, or balanced organic fertilizer on top of the soil and lightly mix it in with the compost. Also see Ways to Improve Garden Soil for tips on building healthy soil.
Starting Seeds Indoors
Starting seeds indoors under lights will give you a head start on the growing season. Sow seeds 6 to 8 weeks before you plan to plant them outside. This will provide you with healthy seedlings that are 4 to 6 inches tall and old enough to survive transplant shock. You can learn more about starting seeds indoors with this article: 10 Steps to Starting Seeds Indoors.
To sow seeds:
- Fill your seed starting containers with damp seed starting mix to within 1/2-inch of the top of the container.
- Poke a hole about 1/2-inch deep, drop in a couple of seeds, and then cover with soil mix.
- Gently moisten the soil with water from a spray bottle and cover the containers with a humidity dome to retain moisture.
- Place the container in a warm location or on a seedling heat mat. Kale seeds germinate best in temperatures between 60 to 75˚F.
- Give them light. You can expect to see sprouts within 6 to 10 days. Once the seeds sprout, place the plants under grow lights, and continue to keep the soil moist.
- Fertilize for strong plants. Once the plants form their true leaves, you can begin feeding with a half-strength of liquid fertilizer, such as fish emulsion. Follow the directions on the bottle.
- Thin to the strongest seedling by cutting any extras with scissors. You can add the thinnings to salads.
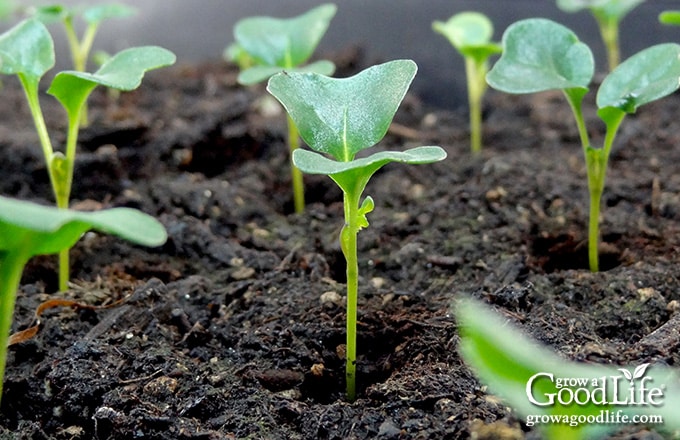
Young kale seedlings growing under lights.
Transplanting Seedlings
Kale seedlings are ready to be transplanted into the outdoor garden once they are 3 to 4 inches tall. Wait to transplant until after the danger of heavy frost is passed, and the soil has warmed to at least 55˚F.
If you start seedlings indoors or purchase transplants from a warm greenhouse, they will need to be hardened off to adjust to the outdoor environment. The hardening-off period helps your plants adapt to the sun, wind, and chilly nights they will experience in the garden.
Follow the steps in this article to harden off your seedlings before transplanting: How to Harden Off Seedlings.
Once your kale seedlings are hardened off, it’s time to transplant them into their permanent location in the garden. Be sure to prepare the garden beds ahead of time and thoroughly water the soil the day before transplanting, especially if the weather has been dry.
Opt for a cloudy day with no wind to minimize stress on the plants. Late afternoon or evening is the ideal time to transplant as it allows the plants time to adjust without exposure to harsh sunlight.
To transplant your seedlings:
- Begin by digging holes in the garden bed slightly larger than each plant’s root ball.
- Space the holes at least 12 to 18 inches apart, depending on the variety of kale you are growing.
- Carefully remove the seedlings from their containers or seed trays and gently loosen the roots, being careful not to damage them.
- Place the seedlings in the holes, making sure the base of the stem is at the soil level. Firmly press the soil around the base of the plant to eliminate any air pockets.
- Water the plants thoroughly to settle the soil around the roots.
For the first week after transplanting, monitor the soil moisture daily and water as needed to keep the soil moist but not waterlogged. Young kale plants can be sensitive to cold temperatures. To protect the tender leaves from frost, you can cover them with blankets, sheets, or frost cloth.
With proper care, your kale seedlings should quickly become established and grow into healthy, productive plants.
Direct Sowing Seeds
Direct sowing kale seeds can be more challenging than starting seeds indoors, as the germination rate can vary depending on soil and weather conditions. However, it allows the plants to establish their roots directly in the garden, eliminating the need for grow lights, hardening off, and transplanting. You can learn more about direct sowing seeds in this article: How to Direct Sow Seeds.
To direct sow seeds:
- Prepare the growing bed as described above, then rake the soil smooth.
- Sow the seeds about 1/2 inch deep and 12 to 18 inches apart in rows spaced 18 to 24 inches apart. If you love baby kale, you can sow the seeds closer and harvest young plants to give the other plants room to grow.
- Water the soil gently, being careful not to wash them away. Keep the soil consistently moist during the germination period, which is typically 6 to 10 days.
- Thin as needed. Once the seedlings have emerged and have their first true leaves, thin them out to 8 to 12 inches apart. This will give the remaining plants room to grow and mature. You can use the thinned seedlings in a salad.
Growing Kale in Containers
Kale can also be grown in containers, making it a great option for those with limited space or poor soil conditions. Here are some tips for successfully growing kale in containers:
- Choose the right container: Kale needs at least 6 to 8 inches of soil depth to grow, plus the plant can be top-heavy, so choose a container at least 12 to 16 inches deep. It should also have drainage holes at the bottom to allow excess water to escape.
- Use quality soil mix: Use a high-quality potting mix rich in organic matter and well-draining. Avoid heavy garden soil, as it can become compacted, restrict root growth, and introduce soil-borne pathogens.
- Prepare the soil: Add a balanced slow-release organic fertilizer to the soil and mix it in (skip this step if your potting mix already contains fertilizer). Water well and let it soak for several hours to hydrate the soil.
- Plant the kale: Once the soil is evenly moist, fill the container and transplant seedlings or sow the seeds.
- Provide adequate sunlight: Kale requires at least 6 hours of direct sunlight daily, so place your container in a sunny location with ample sunlight.
- Water as needed: Keep the soil consistently moist until the plants are established. Afterward, allow the soil to dry out slightly in between watering. Container-grown plants dry out more quickly than those grown in the ground, so keeping the soil consistently moist is important. Water your container whenever the top inch of the soil feels dry.
- Fertilize regularly: Since container-grown plants have limited access to nutrients in the soil, it’s important to fertilize them regularly. Use a balanced organic fertilizer, and apply it regularly according to the directions during the growing season.
Following these tips, you can grow kale in containers and enjoy fresh, homegrown greens even if you don’t have a traditional garden space. You can learn more about growing crops in containers in this article: How to Grow a Container Vegetable Garden.
Growing Kale Microgreens
Enjoy the fresh taste and nutritional benefits of these baby kale microgreens right in your own home!
To grow kale microgreens:
- Prepare a shallow tray of damp potting mix.
- Scatter the seeds on top of the soil.
- Place the tray under lights or on a sunny windowsill.
- Keep the soil evenly moist.
The seeds will germinate and grow to about 2 to 3 inches tall, which usually takes around 25 days.
Once they have reached the desired height, harvest the microgreens and use them in green salads or stir-fry recipes. To ensure a continuous harvest, sow seeds in a new tray every 2 weeks. Check out this article to learn more about growing microgreens: How to Grow Microgreens Indoors.
How to Care for Kale Plants
Kale is a hardy and low-maintenance crop that can provide a bountiful harvest with minimal effort. However, to ensure optimal growth and health, it’s important to provide adequate watering, weeding, mulching, fertilization, and pest and disease control.
In this section, we’ll cover the basics of caring for your kale plants so that you can enjoy a continuous supply of delicious and nutritious greens throughout the growing season.
- Watering: Kale plants need regular watering to thrive. Keep the soil evenly moist but not soggy. Water deeply once or twice a week, depending on the weather and soil conditions. In hot and dry weather, you may need to water more frequently. Water at the base of the plants, and avoid wetting the leaves to prevent fungal diseases.
- Weeding: Keep the area around your kale plants free of weeds, which can compete for water and nutrients. Pull weeds by hand or use a hoe to cut them just below the soil surface, taking care not to damage the shallow roots of the kale plants. You can learn more about managing weeds organically in this article: Tips for Controlling Weeds in the Garden.
- Mulching: Mulching helps to retain moisture in the soil, suppress weeds, and regulate soil temperature. Apply a layer of organic mulch such as straw, shredded leaves, or grass clippings around the base of the kale plants. Keep the mulch a few inches away from the stems to prevent moisture buildup and fungal diseases. Check out this article to learn more about how organic mulch helps your garden.
- Fertilizing: If you incorporated compost and a slow-release fertilizer into your soil before planting your kale, additional fertilizer might not be necessary. However, if your plants seem to be struggling, you can give them a boost with organic liquid fertilizers like fish emulsion, or side dress with blood meal to encourage leafy green growth. Follow the instructions on the container.
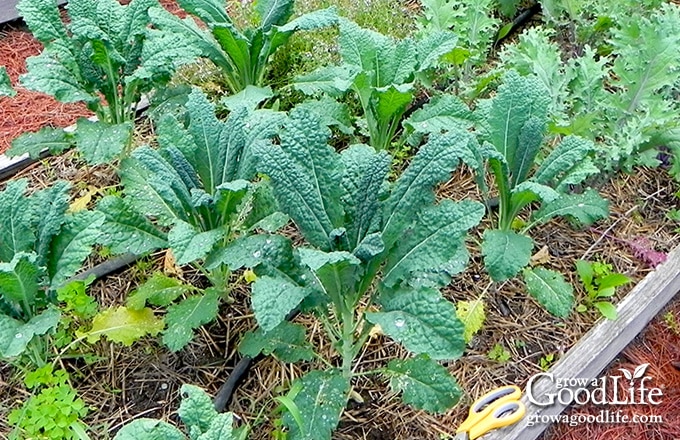
Watch for Pests and Diseases
Kale plants are generally hardy and resistant to pests and diseases. However, some common problems may occur. Here are some pests and diseases you may encounter and organic ways to deal with them:
Insects and Pests:
You can also use row covers to prevent insects and white butterflies from finding your plants. If you discover cabbageworms on your plants, you can try organic methods such as handpicking, squishing, or spraying with a strong stream of water.
- Aphids: These tiny insects can be found on the undersides of leaves and can cause leaves to curl and become distorted. They can be controlled by spraying the plants with a strong stream of water or by using insecticidal soap or neem oil.
- Cabbage worms and caterpillars: These pests can eat through kale leaves, leaving large holes. Handpicking and squishing them is an effective way to control their populations. You can also use Bacillus thuringiensis (BT) to control these pests.
- Whiteflies: These pests are small, white insects that fly around when the plants are disturbed. They suck the sap from the leaves, causing them to turn yellow and die. Insecticidal soap or neem oil can be used to control them.
- Flea beetles: These pests can cause tiny holes in kale leaves, making them look like they have been peppered with buckshot.
- Snails and slugs: These pests can eat through the leaves and leave a slimy trail behind. They can be controlled by handpicking them or by using diatomaceous earth.
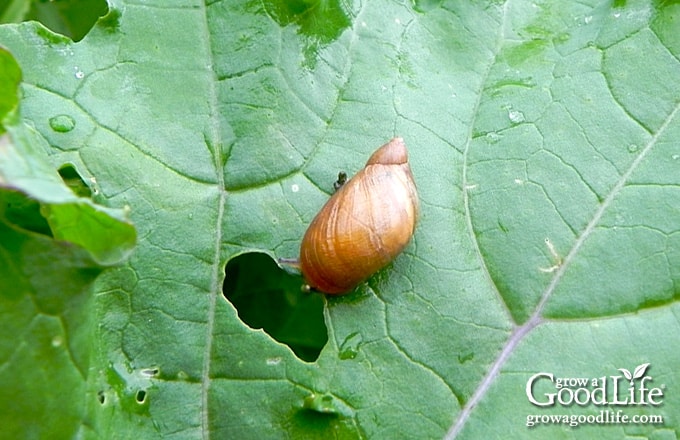
Snail on a kale plant.
Diseases:
For fungal diseases, remove affected leaves promptly and avoid overhead watering.
- Powdery mildew: This fungal disease appears as a white, powdery substance on the leaves. It can be controlled by removing affected leaves and avoiding overhead watering. You can also use a baking soda solution or neem oil to manage the disease.
- Black rot: This bacterial disease causes blackened areas on the leaves, stems, and buds. It can be controlled by removing infected plants and improving air circulation around the remaining plants.
Regularly inspect your kale plants for signs of problems and take action early to prevent them from spreading. A healthy and well-cared-for kale plant is less likely to be affected by pests and diseases.
Preventing Kale from Bolting
Kale will go to seed in warmer weather, which is known as “bolting.” Since kale is a cool-season crop, it prefers growing in temperatures between 60 and 70°F. When the temperature rises above 80°F for an extended period of time, the plants can become stressed and may bolt, which means they send up a flower stalk, and the leaves become tough and bitter.
To prevent bolting, try planting kale in a partially shaded location or using shade cloth to block some of the direct sunlight during the hottest part of the day. Also, keep the plants well watered, and use mulch to help keep the soil cool.
If your plants show signs of bolting, harvest the leaves immediately before becoming tough and bitter. You can still eat the plant after it bolts, including the leaves, flowers, and unopened buds. I like adding these to salads and stir-fries. And if you let the flowers bloom, they will attract pollinators to the garden and eventually form seeds. You can let the seeds mature and dry on the plants and then harvest them for next year’s crop.
How to Harvest Kale
Kale is typically ready to harvest between 55 to 75 days after planting, depending on the variety and growing conditions. However, you can begin to harvest the plant’s outer leaves as soon as they are large enough to eat. Harvesting the leaves in the morning when the plant is the most hydrated is best for flavor.
Begin by picking the outer leaves when they are about 8 to 10 inches long, leaving the inner leaves to continue growing. Cut the leaves off at the base of the stem, or snap them off by bending them downwards and away from the stem. This will encourage new growth and keep the plant producing all season long.
If you prefer to harvest the entire plant, wait until it reaches full size, typically 2 to 3 feet tall. Then, cut the whole plant off at the base, just above the soil line.
Kale can be harvested for several months, continuing to produce until the summer weather becomes too hot or winter temperatures dip below 20˚F. If you’re looking for a sweeter flavor, wait until after a light frost has fallen on the kale leaves in the fall before harvesting them.
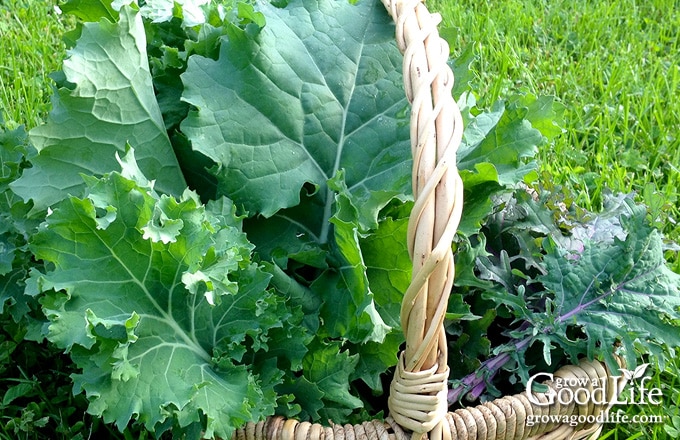
Harvested kale should be used as soon as possible for the best flavor and nutritional value. If you can’t use it right away, place the leaves in an unsealed plastic bag with a damp paper towel, and store it in the refrigerator for up to two weeks. One of my favorite ways to enjoy kale is to sauté it with some garlic and olive oil: Sautéed Greens Recipe.
How to Freeze Kale
When you have an abundance of freshly harvested kale, you can blanch and freeze it for later use in soups and stews. Freezing kale is easy and convenient, allowing you to preserve the nutrients and flavor of the vegetable for up to six months.
To blanch and freeze kale:
- Start by bringing a large pot of water to boil over high heat, and fill a large bowl with ice water.
- Wash the kale leaves thoroughly to remove any dirt or debris. Then, remove the tough stems and tear the leaves into bite-sized pieces.
- Once the pot boils, blanch the prepared kale for 2 to 3 minutes.
- Remove the leaves and plunge them into the ice water to stop the cooking process.
- Squeeze out any excess water using a clean kitchen towel or paper towels.
- Spread the kale out on a parchment-lined baking sheet and place it in the freezer.
- Once the kale is frozen, transfer it to a freezer-safe bag or container.
- Label the bag or container with the date and the contents, and store it in the freezer for up to six months.
When you’re ready to use the frozen kale, remove the amount you need and add it directly to your recipe. Frozen kale works well in soups, stews, smoothies, and other dishes.
—
Growing kale in your vegetable garden is a great way to enjoy this nutritious and delicious green. With a little bit of preparation and care, you can have a bountiful harvest of kale that can be enjoyed in a variety of dishes.
From salads to smoothies, kale is a versatile vegetable that can be used in countless recipes. I hope this growing guide encourages you to give kale a try in your garden and enjoy the many benefits it has to offer.
Good planning is key to a successful vegetable garden
Whether you are new to growing your own food or have been growing a vegetable garden for years, you will benefit from some planning each year. You will find everything you need to organize and plan your vegetable garden in my PDF eBook, Grow a Good Life Guide to Planning Your Vegetable Garden.

[ad_2]
