[ad_1]
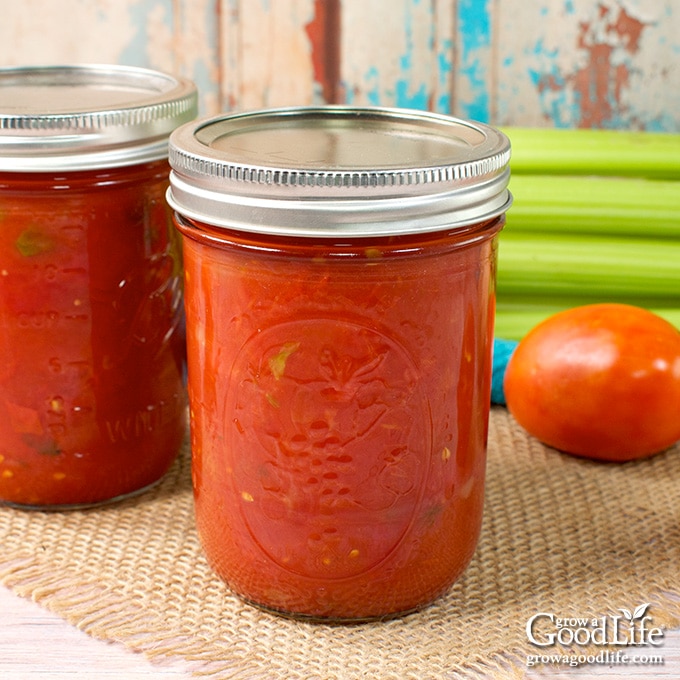
Delight in the flavors of this tomato and vegetable mix, aka Minnesota Mix stewed tomatoes recipe. It is a fantastic water bath-canning recipe that ensures the safety of your tomatoes and vegetables.

This tomato and vegetable mix canning recipe is called Minnesota Mix because it was developed and tested by the University of Minnesota Extension office. It’s a fantastic water bath canning recipe that ensures the safety of your stewed tomatoes and vegetables.
You’ll find that this recipe is very similar to the pressure-canned stewed tomato recipe, but it uses different proportions of ingredients and citric acid or bottled lemon juice to make it safe for water bath canning. The results are the same, a delicious pantry staple you can use as a shortcut to many dishes.
Steps to Make and Water Bath Can Stewed Tomatoes
Canning stewed tomatoes is a quick way to preserve a bumper crop of ripe garden tomatoes and infusing them with the flavors of celery, onions, and peppers. You can use the stewed tomatoes in so many ways, including tossing with pasta, and adding to stews, chilies, soups, and casseroles.
Before you begin, reviewing this article on water bath canning at the National Center for Home Food Preservation website may be helpful.
This is the “Minnesota Tomato Mixture” recipe from the University of Minnesota Extension website. We found it very salty when testing the original recipe and reduced the amount of salt from 3 to 1 teaspoon. The salt is optional for flavor and can be skipped entirely if you prefer. You also can safely omit or decrease the amount of celery, peppers, and onions, but do not increase the amount, or it will alter the acidity level and make it unsafe for canning.
Step 1: Prepare the Canning Equipment
Gather your canning and kitchen equipment. You will need:
- Water bath canner and canning rack
- 6 pint sized canning jars, or 3 quart canning jars
- Canning lids and bands (new lids for each jar, bands can be reused)
- Canning tools: jar lifter, canning funnel, ladle, and bubble popper
- Plus basic kitchen supplies such as a large stainless steel sauce pot, large bowl, towels, knife, cutting board, and large spoon.
Wash the canning jars, lids, canning tools, and kitchen equipment in warm, soapy water and rinse well. Inspect the jars carefully, and don’t use any that have cracks or chips, as these may break when heated.
The jars must be heated before filling to prevent breakage due to thermal shock. Place the jar rack into the water bath canner, set the jars upright in the canner, and add enough water to cover the jars. Bring the canner to a simmer (180˚F) for 10 minutes, and keep the jars hot until you are ready to fill them.
Step 2: Prepare the Vegetables
This recipe calls for chopped tomatoes, celery, onions, and peppers. This means you will peel, seed, and chop your vegetables before measuring using measuring cups.
First, gently rinse the veggies under clean, running water, and let them air dry on a towel. Then tackle the vegetables one by one, so you can measure each one accurately. Chop and drop them into a measuring cup as you go, making sure you reach the required amounts.
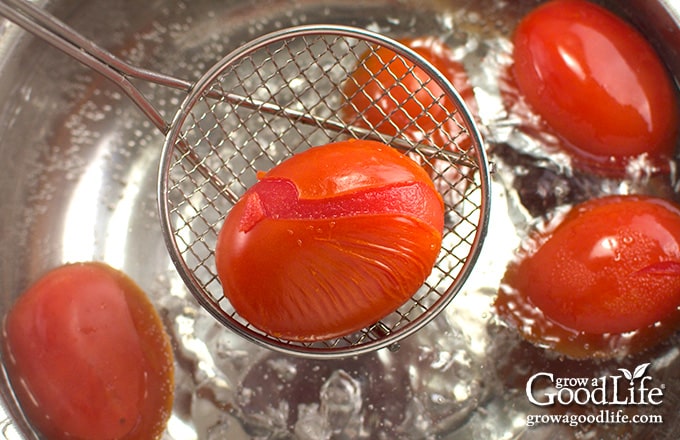
- Tomatoes: You need about 6 pounds of fresh tomatoes to yield 12 cups of peeled, cored, and chopped tomatoes. Feel free to pick any ripe tomatoes you like for this recipe – they’ll all work beautifully! Blanch in boiling water until the tomato skins crack, and then plunge them into an ice bath to cool. Remove the peels, cores, and chop them into large pieces. Measure 12 cups and add them to a large sauce pot.
- Celery: About 2 stalks of celery will give you 1 cup of chopped celery. Remove the tops and bottoms, cut the stalks into pieces, and measure 1 cup of chopped celery. Add it to the pot with the tomatoes.
- Onions: Grab a small onion – red, white, or yellow, whatever you prefer – peel and chop it up. Peel, chop, measure 1/2 cup of chopped onion, and add it to the pot.
- Peppers: One small bell pepper will give you 1/2 cup of chopped peppers. This recipe calls for green bell peppers, but you can use any variety of peppers you want for this recipe! Remove the stem, seeds, and membranes from the peppers, and give them a nice chop. Measure out 1/2 cup of chopped peppers and drop them in the pot.

Step 3: Simmer the Stewed Tomato Medley
Place that large saucepot filled with the prepared tomatoes and veggies onto the stove. If you are using salt, add it now and then stir until everything is well combined.
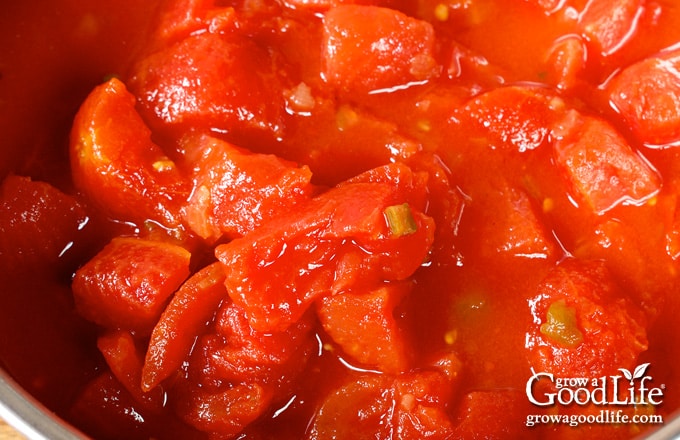
Cover and crank up the heat to medium-high, bringing the pot to a gentle boil. Once the pot boils, reduce the heat and let it simmer. Cook while occasionally stirring until liquid is released and the vegetables are tender, about 10 minutes. Keep the mixture hot as you fill the jars.

Step 3: Can the Stewed Tomatoes
Set up your work area by laying a dry kitchen towel on the counter and placing the citric acid or lemon juice nearby, along with the measuring spoons, canning funnel, ladle, bubble popper, canning lids, bands, and a damp paper towel for wiping the rims of the jars.
Use the jar lifter to remove a hot jar from the canner, drain the water back into the pot, and place it upright on the towel. Keep the remaining jars in the canner so they stay warm.
Depending on the jar size, add the citric acid or lemon juice to the jar:
- Pints: Add 1/4 teaspoon of citric acid or 1 tablespoon of bottled lemon juice.
- Quarts: Add 1/2 teaspoon of citric acid or 2 tablespoons of bottled lemon juice.
Then use your canning funnel and ladle to fill the jar with the hot tomato mix leaving a 1/2-inch headspace at the top of the jar. Run the bubble popper through the contents to release any trapped air bubbles, and adjust the headspace again if needed.
Give the jar’s rim a quick wipe with a damp towel to remove any residue. Center a lid on the jar, place the band over it, and screw it on until fingertip tight. Place the jar back into the canner, and repeat with the rest of the jars.
Once the filled jars are in the canner, adjust the water level to cover the jars by two inches. Cover, bring the canner to a boil, and process the jars for the times indicated in the recipe below.
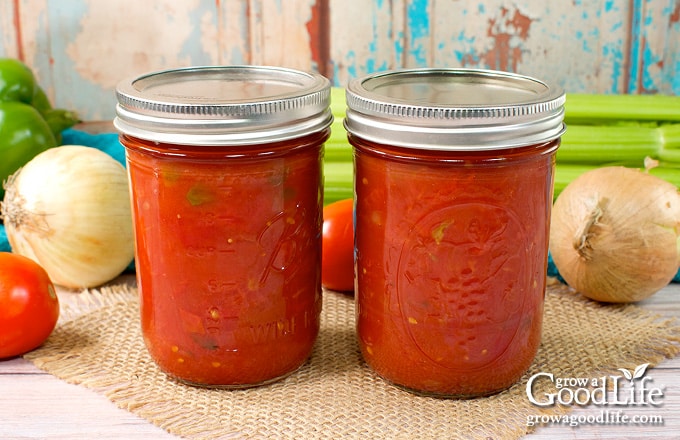
After processing time is complete, remove the jars and place them on a dry towel to cool undisturbed for 12 to 24 hours. Once the jars have cooled, store them in a cool, dark location for 12 to 18 months. The recipe yields about 6 pints, or 3 quarts, depending on how juicy your tomatoes are.
There you have it – your very own homemade canned stewed tomatoes, ready to add their magic touch to all your favorite recipes!

Our favorite way to enjoy stewed tomatoes is to make American Chop Suey, also known as Goulash. Here is a quick recipe:
- 1 pound ground beef, 1 quart jar of stewed tomatoes, herbs such as basil, oregano, garlic powder, salt and pepper, 1 pound box of elbow macaroni pasta, and Parmesan cheese.
- Sauté ground beef until cooked. Add stewed tomatoes, herbs, and season to taste. Let it simmer to blend flavors.
- Meanwhile, cook the macaroni in a large pot of water, drain using a strainer, and combine it with the simmering tomato sauce. Serve hot, topped with freshly grated Parmesan cheese.
Stewed Tomatoes Water Bath Canning Recipe
Delight in the flavors of this tomato and vegetable mix, aka Minnesota Mix stewed tomatoes recipe. It is a fantastic water bath-canning recipe that ensures the safety of your tomatoes and vegetables.
Ingredients
- 12 cups peeled, cored, and chopped tomatoes about 6 pounds before prep
- 1 cup chopped celery
- 1/2 cup chopped onions
- 1/2 cup chopped green peppers
- 1 teaspoon canning salt
- Bottled lemon juice or citric acid
Instructions
Prepare the Canning Equipment:
-
Start by giving your jars, lids, screw bands, and canning tools a good scrub in hot, soapy water. Rinse them off thoroughly and set them aside to air dry on a clean kitchen towel.
-
Place the jar rack into the water bath canner, place jars in the canner, and add water to cover. Bring the canner to a gentle simmer at 180˚F for 10 minutes, and keep everything hot until you are ready to fill the jars.
Simmer the Vegetables:
-
Add the prepared tomatoes, celery, onions, peppers, and salt to a large stainless steel saucepot, and stir to combine.
-
Bring the mixture to a boil over medium-high heat, then reduce the heat and simmer (180˚F) for 10 minutes. Stir occasionally to prevent sticking.
Fill the Jars:
-
Spread a kitchen towel on the counter. Use your jar lifter to remove a jar from the canner, drain it, and place it on the towel. Keep the remaining jars in the canner so they stay hot.
-
Add 1/4 teaspoon of citric acid or 1 tablespoon of bottled lemon juice to each pint-sized jar. Or add 1/2 teaspoon citric acid or 2 tablespoons lemon juice to each quart jar.)
-
Use the canning funnel and ladle, and fill the warm jars with hot tomato mixture leaving 1/2-inch headspace.
-
Run the bubble popper through the jar to release air, and wipe the rim clean with a damp paper towel.
-
Center a lid on the jar, and screw on the band until it is fingertip tight. Use the jar lifter to place the jar back into the canner, and repeat with the remaining jars.
Process the Jars in a Water Bath Canner:
-
Once the filled jars are all in the canner, adjust the water level to be about 2 to 3 inches above the jar tops.
-
Cover the canner and bring it to a boil over high heat. Once the water boils vigorously, set your timer and process pints for 40 minutes and quarts for 50 minutes at altitudes of less than 1,000 ft. Adjust processing time for your altitude if necessary. (See notes)
-
When the processing time is complete, turn off the heat, remove the cover by tilting the lid away so that steam does not burn your face, and allow the canner to cool down and settle for 5 minutes.
-
Spread a dry kitchen towel on the counter. Use a jar lifter to remove the jars one at a time from the canner. Keep the jars upright, and place them on the towel. Do not tighten ring bands or test the seals yet. Let the jars sit undisturbed for 12 to 24 hours to cool.
-
After the jars have cooled for at least 12 hours, check to be sure the lids have sealed by pushing on the center of the cover. The lid should not pop up. If the top flexes up and down, it did not seal. Refrigerate the jar and use it within a week.
-
Remove the ring bands, wash, label, date the jars, and store the canned tomatoes in a cool, dark place between 50 to 70 degrees F for 12 to 18 months. Once the jar is open, refrigerate it and use it within a week. The recipe yields about 6 pints or 3 quarts, depending on the juiciness of your tomatoes.
Notes
All times are at altitudes of less than 1,000 ft above sea level. Adjustments must be made for altitudes greater than 1,000 ft. Visit whatsmyelevation.com to check your elevation and adjust the processing time if necessary:
- Pints at altitudes of 1,001 – 3,000 ft. is 45 minutes, 3,001 – 6,000 ft. is 50 minutes, and above 6,000 feet is 55 minutes.
- Quarts at altitudes of 1,001 – 3,000 ft. is 55 minutes, 3,001 – 6,000 ft. is 60 minutes, and above 6,000 feet is 65 minutes.
Nutrition
Serving: 0.5g | Calories: 30kcal
Discover More Delectable Stewed Tomato Recipes!
Embrace the convenience of stocking your pantry with home-canned stewed tomatoes. Check out these additional recipes that satisfy various tastes and preferences:
- Mexican Style Stewed Tomatoes and Chiles: Create your own Rotel-style jars of flavorful tomatoes and green chilies with this pressure canner recipe. Perfect for adding a zesty twist to your favorite Mexican dishes and a must-have pantry staple for spice enthusiasts.
- Canning Plain Stewed Tomatoes: This crushed tomatoes canning recipe keeps it simple yet delicious. Safely preserved using a water bath canner, these plain stewed tomatoes will bring a burst of natural goodness to any recipe.
- Stewed Tomatoes Pressure Canning Recipe: This classic recipe is perfect for pressure canning to preserve the vibrant flavors of ripe tomatoes, celery, onions, and peppers. Stock your pantry with this versatile ingredient to add a burst of flavor to your favorite dishes.
Good planning is key to a successful vegetable garden
Whether you are new to growing your own food or have been growing a vegetable garden for years, you will benefit from some planning each year. You will find everything you need to organize and plan your vegetable garden in my PDF eBook, Grow a Good Life Guide to Planning Your Vegetable Garden.

[ad_2]
