[ad_1]
Sweet potatoes are a tasty and versatile vegetable to grow. This guide will teach you the perfect time to harvest sweet potatoes, how to properly cure the roots, and store them, so they stay fresh all winter.
Whether you’re looking for a hearty breakfast, a light lunch, or a filling dinner, sweet potatoes are a versatile and nutritious option. You can roast them up with other root veggies and serve with eggs for breakfast, bake or air fry sweet potato fries to enjoy with your favorite sandwich or burger, or make mashed sweet potatoes as a side dish for any meal. And don’t forget dessert! Sweet potatoes can be used to make pies, quick breads, and other sweet treats.
Sweet potatoes are a great crop to grow in your vegetable garden for winter food storage. Here you will learn when to harvest your sweet potatoes, how to cure them, and the best storing conditions, so they last all winter.
Harvesting Sweet Potatoes
Sweet potatoes are a long-season crop that takes the whole summer to develop. It takes roughly 90 to 150 days to mature, depending on the variety and growing conditions. With such a long growing season, you will want to harvest and preserve your sweet potatoes correctly.
In this section, we’ll go over the ideal time to harvest sweet potatoes and how to dig them up without causing damage to the sensitive tuber.
When to Harvest Sweet Potatoes
While freshly harvested sweet potatoes taste more starchy than sweet, you can dig up sweet potato tubers at any size for fresh eating. However, the flavor and storage capability improve if they are fully developed when harvested.
Sweet potato roots continue to grow until the soil temperature cools to 65˚F or the foliage is killed by frost.
Keep track of the days to maturity for the variety you are growing, dig up a few roots to check the size, and watch the vines towards the end of the growth period for signs that the plant has finished growing.
Watch the Foliage
Since sweet potatoes grow underground, it isn’t easy to visually see whether the potatoes are ready to be picked. For this reason, we have to judge by the looks of their vines.
Once the expected maturity time has arrived, the first signal that the sweet potato plants have finished growing is the leaves start to turn yellow at the ends of the vines. Then the foliage begins to whither and eventually dies.
If the weather is still warm, I like to wait until the foliage dies back, trim it, and then let the potatoes stay in the ground for about a week to give the tubers time for the skins to toughen before digging them up.
However, I often run out of time before our fall frost, and the roots must come out of the ground immediately before cold weather arrives.
Harvest Before Frost
While sweet potatoes can endure a light frost, they are not cold hardy and should be harvested before the first killing frost. In cold climates, be sure to watch the weather for frost predictions. If nighttime temperatures are low, you can cover the plants to protect the foliage from frost damage.
If a light frost surprises you before you have the time to harvest your sweet potatoes, don’t fret. While the foliage will die back after a frost, your tubers are likely still fine, but be sure to dig them up as soon as possible because cool soil will reduce their quality and storage life.
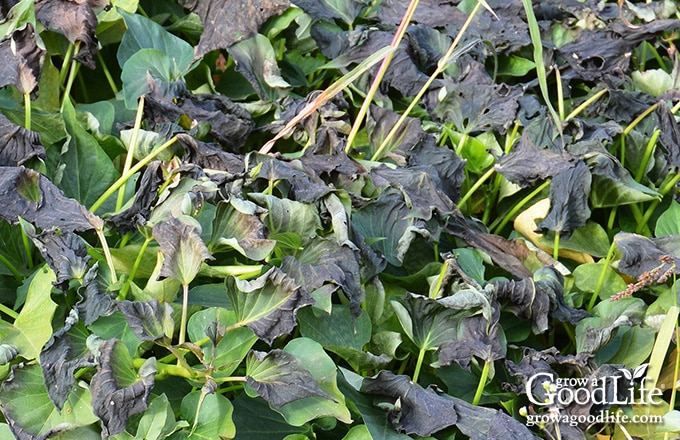
While the root tubers under the ground are insulated from light frost, the vines will rot and turn black from the cold. Dead foliage can transfer this rot from the vines to the roots. If you can’t dig them up the following day after your first frost, take your pruning shears and cut your plant back to the base of the ground, and compost the foliage.
Choose an Overcast Day
Try to harvest sweet potatoes on a cloudy day. The skins are fragile and can be damaged by sunscald, making the potatoes more susceptible to disease and rot.
When sunshine is unavoidable, set up an umbrella to shade the area or move the roots beneath a nearby tree as soon as you dig them up.
How to Harvest Sweet Potatoes
The first thing you’ll want to do when harvesting sweet potatoes is to locate each plant’s crown. If you haven’t cut the vines yet, now is the best time to do it.
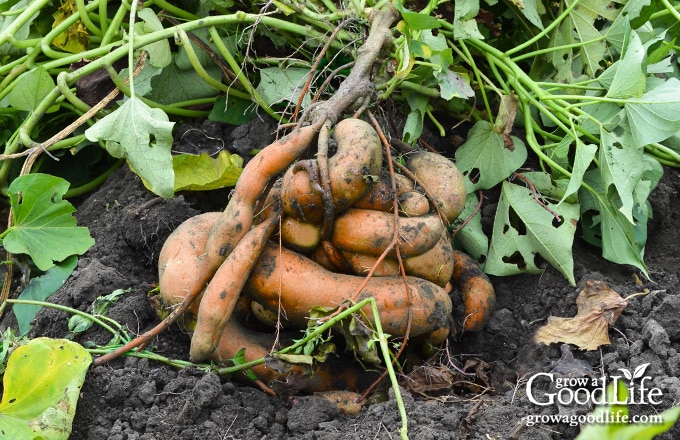
Move the mulch aside, find the crown, and loosen the soil surrounding the plant to make unearthing the roots easy. Use a garden fork to dig the ground about 18 inches around each plant and 6 inches deep. Next, lift the crown and carefully dig out your tubers by hand without damaging the delicate roots.
Make sure you gently handle the sweet potatoes because they bruise easily. Shake away any excess dirt, but do not wash the roots.
Inspect each potato and remove the ones that are damaged or rotten. Keeping the bad potatoes near healthy ones can risk the spread of disease. After digging up all the potatoes, it is time to cure them.
Curing Sweet Potatoes
So, you’ve successfully got your sweet potatoes out of the ground. Time to cook them up and dig in, right?
Well, we’re not quite there yet. Before having a sweet potato feast, we must cure these potatoes to toughen their skin and sweeten their flavor. Curing is very straightforward, though be prepared to play the waiting game.
What is Curing?
Curing is a necessity when it comes to storing your sweet potatoes long-term. Curing can also be referred to as “suberization” or “wound healing.”
During the curing process, the sweet flavor develops as the starches convert to sugar. In addition, the skins thicken and heal any scratches and bruises, protecting the roots from bacteria penetration and moisture loss.
If you are buying your sweet potatoes from the farmers’ market, ask if they have already been cured. If they have, you can skip the curing process and pack them up for storing as described below.
How to Cure Sweet Potatoes
Curing is the only way to ensure that the potatoes will store well through the winter. Uncured root tubers have fragile skin sensitive to bruising, disease, and rot. So it is important to handle them with care to avoid damage.
Select a location that is shaded, warm, and has high humidity. An ideal temperature range for curing sweet potatoes is between 80 to 85˚F with a relative humidity of 90 to 95%. Consider curing in a shed, garage, or a shady screened-in porch.
In addition to shade, temperature, and humidity, airflow is another key factor in a successful curing process. Maintaining proper airflow prevents condensation, keeps the potatoes dry, and allows the potatoes to breathe.
Spread the unwashed sweet potatoes in a single layer in trays or boxes lined with newspaper. Arrange them so they are not overlapping or touching. Cover the trays with burlap or a towel to reduce light, but let the air circulate. Then allow the potatoes to set undisturbed to cure for 10 to 14 days. If the temperature is cooler than 80˚F, add another 7 days to your curing time.
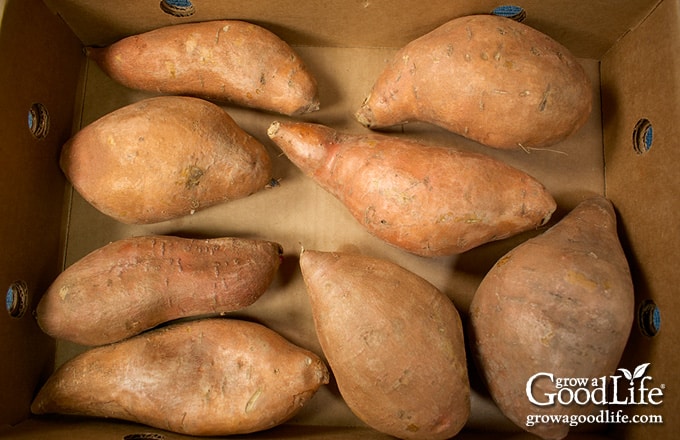
After the curing process is complete, inspect your potatoes again. If you find potatoes with damage or bruises, separate these and use them up quickly, or preserve them another way.
Storing Sweet Potatoes for Winter
After curing your sweet potatoes, they are ready to be stored in covered crates, baskets, boxes, or bins with some holes for ventilation.
Ideal storing conditions for sweet potatoes are in a dark, cool, and humid area that maintains a temperature between 55 and 60˚F and 60 to 75% relative humidity. If you provide these key factors, you’ll enjoy your harvest for months to come.
Some great locations for storing sweet potatoes include a root cellar, garage, basement, or any area of the house that is dark, cool, and humid. Don’t worry if your conditions are not perfect. You can still store your sweet potatoes, but they may not last as long.
If your storage area is too cold, the roots will develop hard white tissue in the center. If the site is too warm, the tubers may sprout or begin to shrivel, soften, and eventually rot. If you check on them frequently while in storage, you can monitor the roots and save them if they show signs of going bad before they spoil.
How to Store Sweet Potatoes
Whether you grow your own sweet potatoes or stock up at the farmers’ market, here is how to prepare your sweet potatoes for long term storage.
You can store cured sweet potatoes in crates, baskets, or any cardboard box as long as it has holes for ventilation. Since the roots are still living tissue, they continue to breathe even after harvesting. Therefore, storing them in crates will keep your sweet potatoes contained and maintain good ventilation to help prevent rotting.
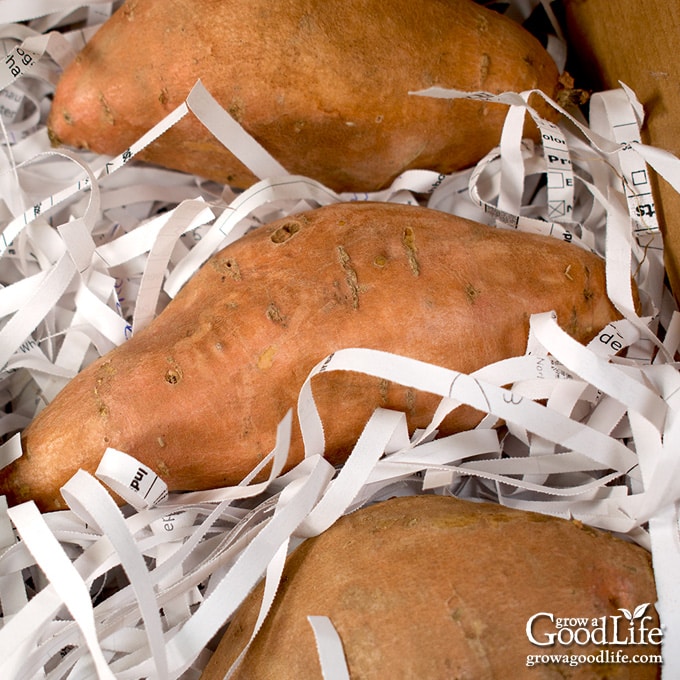
I store my sweet potatoes the same way I store regular potatoes, in recycled paper boxes cushioned in shredded paper from bills and other paperwork.
I cut several holes in the sides of the boxes for air circulation, add a layer of shredded paper, and position the sweet potatoes in a single layer, so they are not touching. Then I cover them with more shredded paper and continue layering until the box is full.
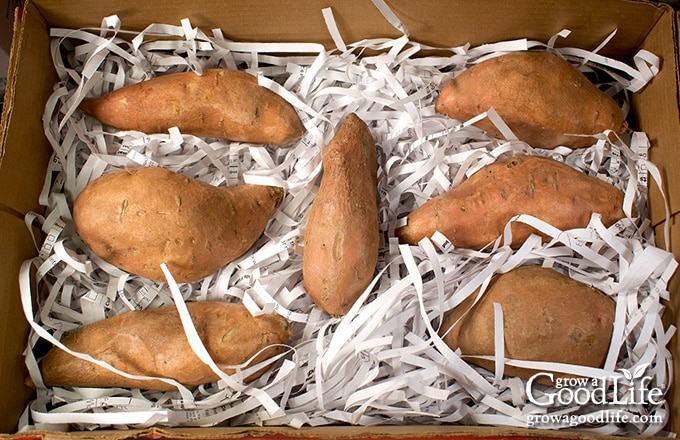
Alternatively, you could wrap your sweet potatoes individually in newspaper to provide a barrier and shield them from light. The newspaper will not only cushion the roots, but it is porous enough to provide ample airflow.
Layer the wrapped sweet potatoes in the crate and separate each layer with additional newspaper. Crowding can stifle airflow, which is a recipe for mold and premature rot. Use multiple containers to avoid overcrowding.
As you pack the sweet potatoes, gently brush off loose soil and look them over again. Separate all small, skinny, immature roots and any that show signs of damage and spoilage. Use smaller and damaged sweet potatoes first, as these won’t last as long in storage.
Cover the crates or boxes, and place them in your food storage area that maintains a temperature between 55 and 60˚F and 60 to 75% relative humidity.
You can store sweet potatoes with winter squash, which has similar storing conditions but avoid storing them near fruit or onions.
How Long do Sweet Potatoes Last in Storage?
Properly cured mature sweet potatoes can last for up to a year if stored in ideal conditions.
Our sweet potatoes last about six months when stored in our cool basement through winter, from October to April the following year. Then, the roots will begin to sprout once the weather warms in spring.
How to Tell if a Sweet Potato is Bad?
It is a good idea to look through your storage boxes every once in a while to check them for spoilage. But, first, give the box a good sniff. A musty odor is a good sign that you have a rotting potato in the box.
Sort through the box and remove any discolored, shriveled roots or ones that show obvious signs of rotting, along with any damp packing material. Then, repack with fresh shredded paper.
Sprouted sweet potatoes are still good but may quickly deteriorate if left in storage. Remove the sprouts, and plan on using them within the next few weeks.
Other Ways to Preserve Sweet Potatoes
While storing sweet potatoes is the easiest way to preserve them, they may begin sprouting prematurely if they have not been cured correctly or if they experience temperature fluctuations.
It is a good idea to have a backup plan if you discover that your storage area is not ideal. Luckily, there are other ways to preserve sweet potatoes:
Freezing Sweet Potatoes
Blanching and freezing is a quick way to have cooked sweet potatoes on demand for meals. However, you will still have to go through the curing process first to improve texture and allow the starches to convert to sugar to sweeten the flavor. You can freeze sweet potatoes in chunks, mashed, and as sweet potato fries. After curing, follow the steps outlined in this article on How to Freeze Potatoes.
Canning Sweet Potatoes
Another way to save your sweet potatoes is to pressure can them. Canning sweet potatoes in a syrup made from sugar, honey, or maple syrup helps to preserve the sweet flavor. Canned sweet potatoes are ready to use in all your favorite recipes without extra time for peeling and cooking. Just follow the steps in this safe canning recipe: How to Can Sweet Potatoes.
—
I hope these tips help you preserve sweet potatoes for long-term food storage. Growing sweet potatoes is a fun and rewarding experience, but to make the most of your harvest, properly curing and storing them will keep them fresh so you can enjoy them in all your favorite recipes.
You May Also Like:
Good planning is key to a successful vegetable garden
Whether you are new to growing your own food or have been growing a vegetable garden for years, you will benefit from some planning each year. You will find everything you need to organize and plan your vegetable garden in my PDF eBook, Grow a Good Life Guide to Planning Your Vegetable Garden.

[ad_2]
