[ad_1]
Pickling is the easiest way to turn those end-of-season, unripe tomatoes into something delicious. Learn how to preserve pickled green tomatoes with this canning recipe.
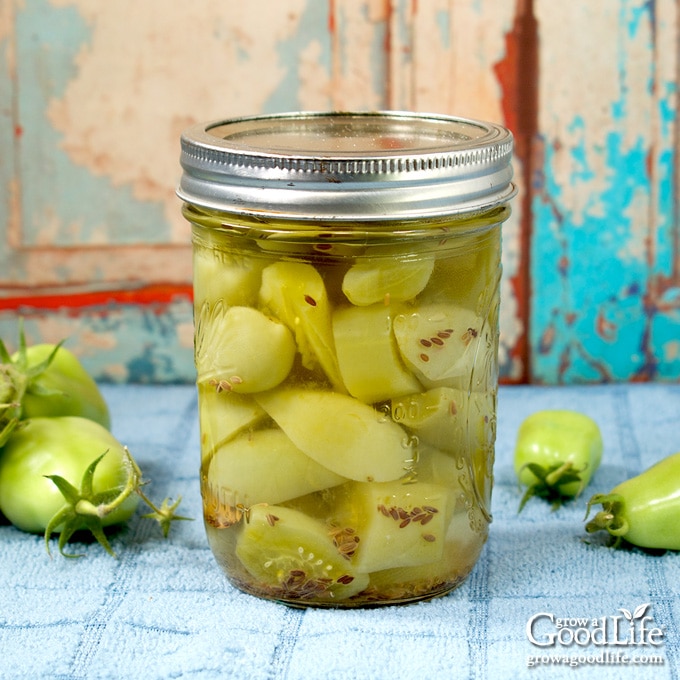
By the end of summer, the tomato plants begin to slow down as daylight decreases and the nights become cool. Often there are a bunch of green tomatoes on the vines that have no chance of maturing and ripening before the first frost hits.
Try this pickled green tomato recipe if you are stuck with a lot of unripe green tomatoes at the end of the gardening season.
With just a few simple ingredients and basic canning equipment, you can preserve these dill tomato pickles in shelf-stable jars and enjoy them all year long. The process is relatively straightforward, and we’ll walk you through each step so you can confidently make your own.
Pickles are one of the easiest things to make at home and are a great way to add flavor to your meals. For example, pickled green tomatoes can be served straight out of the jar as a side dish for dinner or added to a winter salad. In addition, you can chop and spoon into burgers, hot dogs, sandwiches, and wraps the same way you would relish.
About the Ingredients
This easy pickle recipe is made with unripe green tomatoes and infused with a simple dill and garlic pickling brine. Here are a few tips that will help you get the best results:
Unripe Green Tomatoes
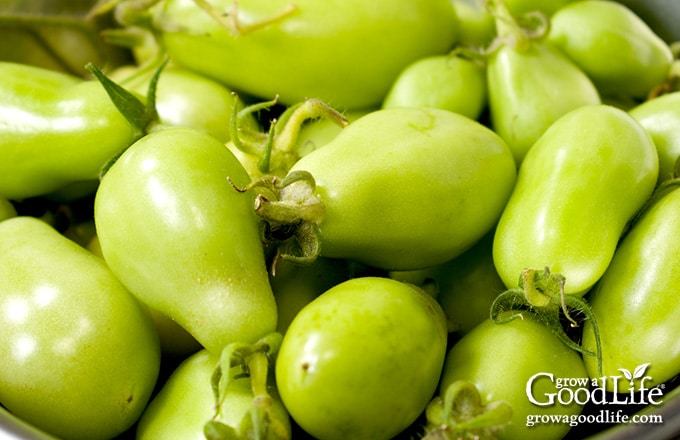
Use immature unripe red tomatoes, not a green tomato variety. Undeveloped tomatoes have soft, white seeds and have a dry interior without the jelly-like substance that develops as the tomato ripens.
Green unripe tomatoes are crisp and tart, with a similar texture to cucumbers when pickled. Small fruit holds up to the pickling process better than large slicing tomatoes. This recipe is excellent for using up all those leftover cherry tomatoes. Tomatoes that have begun to ripen will be softer, juicier, and mushier when pickled.
Pick disease-free green tomatoes before frost. Tomatoes that are unhealthy or have been affected by frost may have a higher pH, making them unsafe for canning.
Vinegar with 5% Acidity
While this recipe uses white vinegar, you can swap the type of vinegar used to change the flavor. Do not reduce the amount of vinegar in this recipe, but feel free to substitute it with another kind of vinegar with at least 5% acidity.
White vinegar is clear vinegar made by distilling corn and rye, while apple cider vinegar is made from fermented apples, giving it a mild and fruity tart flavor.
Pickling Salt
Use pickling salt, also called canning salt, for all your home canning recipes. Table salt contains iodine and anti-caking agents that may make the brine cloudy or darken pickles.
Salt adds flavor and maintains texture to pickled foods. It can be reduced if desired but may affect the quality of your pickles.
Pickling Brine Flavorings
The recipe below is for dill green tomato pickles flavored with dill, garlic, and bay leaves. The dill and garlic add flavor, while the bay leaves supplement flavor and tannins that help keep the pickles crisp.
You can adapt the dried seasoning without compromising the safety of this recipe. Feel free to swap or add additional dried spices to the jar to create different flavored pickles:
- Sweet Pickled Green Tomatoes: Add 1 cup of sugar to the brine, and replace the dill seeds with 1 teaspoon mustard seeds, 1/2 teaspoon celery seeds, 2 allspice berries, and 3 whole cloves.
- Hot and Spicy Pickled Green Tomatoes: replace the dill seeds with 1/2 teaspoon mustard seeds, 1/2 teaspoon coriander seeds, 1/2 teaspoon black peppercorns, and 1/2 teaspoon red pepper flakes.
- Homemade Pickling Spice: Check out this article for more pickling spice ideas.
No Water Bath Canner? No Problem!
If you don’t have a traditional water bath canner, you can use a large stockpot and rack to heat process the jars.
Place a rack in the bottom of the pot to elevate the jars away from direct heat and allow the water to circulate as they are processed. You can use a round cooling rack or even tie together extra canning rings.
Your pot will need to be tall enough to cover the rims of the jars by a few inches of water, plus two inches of space to prevent hot water from splashing out of the pot.
Steps to Make Pickled Green Tomatoes
This tested safe canning recipe is the Dill Green Tomatoes recipe from the Ball Blue Book Guide to Preserving. Feel free to experiment with dried herbs as flavorings, but keep the proportions of the vinegar, water, and green tomatoes the same to ensure the proper chemistry to preserve safely.
Before you begin, reviewing this article on water bath canning at the National Center for Home Food Preservation website may be helpful.
You can find a more detailed and printable recipe at the bottom of this article, but these are the general steps for making and canning green tomato pickles:
Step 1: Gather Your Kitchen Equipment
You’ll need:
Step 2: Prepare the Tomatoes
Wash the green tomatoes well under running water. Remove the cores of each tomato using a knife to cut around the stem end, then pry out the core and discard. Slice the tomatoes into equal-sized halves or quarters, place them in a large prep bowl, and set them aside.
Step 3: Prepare the Canning Equipment
Wash your jars, lids, bands, and canning tools in warm, soapy water. Rinse well, and set the lids, bands, and tools aside to air dry until you are ready to use them.
Place your water bath canner on a large burner. Add the canning rack, and place the jars upright on the rack. Fill the canner with enough water to cover the jars. Bring the canner to a simmer (180˚F) and heat the jars for 10 minutes, and then keep the jars hot until you are ready to fill them.
Step 4: Make the Pickling Brine
Add the vinegar, water, and pickling salt to a large pot. Stir to dissolve the salt, and bring the mixture to a boil over medium-high heat. Once the pot begins to boil, reduce the heat, and simmer (180˚F) for 5 minutes. Keep warm as you fill your jars.
While the canner and the brine are heating, organize your work area. Lay a dry kitchen towel on the counter. Peel the garlic and place the spices, prepared tomatoes, canning funnel, ladle, lids, and bands within easy reach.
Step 5: Can the Pickled Green Tomatoes
Use the jar lifter to remove a warm jar from the canner, drain the water back into the canner, and place it on the towel. Keep the remaining jars in the canner so they stay warm.
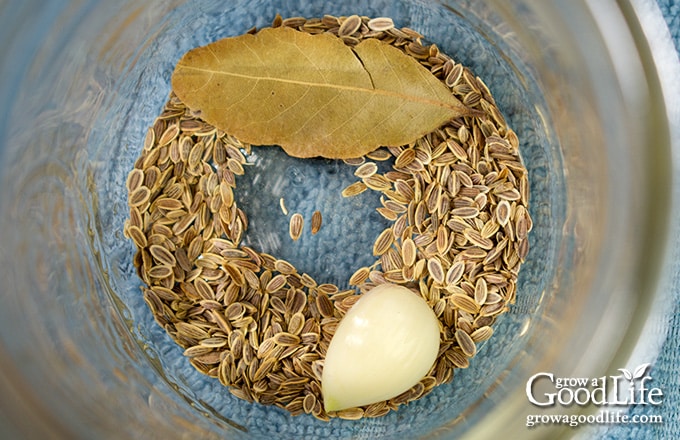
Place the canning funnel on the jar. Add 1 garlic clove, 2 teaspoons of dill seeds (or 1 head of dill), and 1 bay leaf to the jar.
Fill the jar with the prepared tomatoes, and then use the ladle to pour pickling brine over the tomatoes while leaving 1/2-inch headspace. Run the bubble popper through the jar to release trapped air, and adjust the headspace again if necessary.
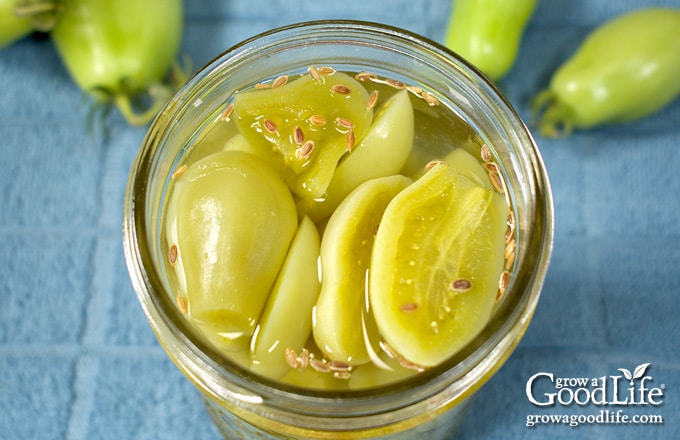
Wipe the rim with a damp towel to remove any residue. Center a lid on the jar, place the band over it, and screw it on until fingertip tight. Place the jar back into the canner, and repeat with the rest of the jars.
Adjust the water level to cover the jars by two inches, bring the canner to a boil, and process the jars for the times indicated in the recipe below.
Once processing time is complete, remove the jars, and let them cool undisturbed for 12 to 24 hours. After cooling for at least 12 hours, test the seals. Refrigerate any that did not seal, and use up within a week.
Wash the jars with warm soapy water, dry, label, and date the jars, and store in a cool, dark location for 12 to 18 months. Wait several weeks for the pickles to develop flavor before opening a jar.
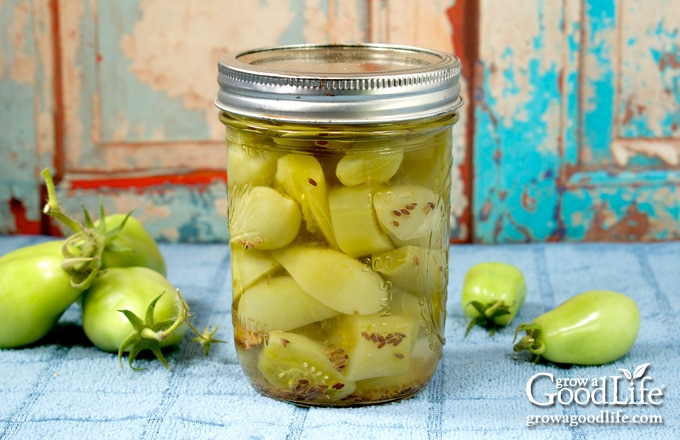
Pickled Green Tomatoes Canning Recipe
Pickling is the easiest way to turn those end-of-season, unripe tomatoes into something delicious. Learn how to preserve pickled green tomatoes with this canning recipe.
Ingredients
- 5 pounds small firm green tomatoes
- 3 1/2 cups vinegar white or apple cider with 5% acidity
- 3 1/2 cups water
- 1/4 cup pickling salt or canning salt
- 6 cloves garlic 1 per jar
- 1/4 cup dried dill seeds or 6 heads of fresh dill (2 teaspoons seeds, or 1 head per jar)
- 6 dried bay leaves 1 per jar
Instructions
Prepare the Tomatoes:
-
Wash the green tomatoes well under running water, remove the core, cut them into even-sized halves or quarters, and set them aside.
Prepare the Canning Equipment:
-
Wash your jars, lids, screw bands, and canning tools in hot soapy water. Rinse thoroughly to remove all suds. Set them aside to air dry on a clean kitchen towel.
-
Place the jar rack into the water bath canner, place jars in the canner, and add water to cover. Bring the canner to a simmer (180˚F) for 10 minutes, and keep hot.
Make the Pickling Brine:
-
Add the vinegar, water, and pickling salt to a large pot. Bring the mixture to a boil over medium-high heat, then reduce the heat to a simmer (180˚F), and simmer for 5 minutes. Keep warm as you fill your jars.
Can the Pickles:
-
Spread a kitchen towel on the counter. Use your jar lifter to remove a warm jar from the canner. Drain the water back into the canner and place it on the towel. Keep the remaining jars in the canner so they stay warm.
-
Add the following to each jar: 1 clove of garlic, 2 teaspoons of dill seeds (or 1 head of dill), and 1 bay leaf.
-
Raw pack the prepared green tomatoes into the jar, leaving 1/2-inch headspace.
-
Use your canning funnel and ladle to add hot brine over the tomatoes while maintaining a 1/2 inch headspace. Make sure the tomatoes are submerged under the brine. Remove any that stick out, and adjust the headspace again if needed.
-
Remove air bubbles with the bubble popper and wipe the rim. Center a lid on the jar, and screw on a band until it is fingertip tight. Use your jar lifter to place the jar back into the canner, and repeat with the remaining jars.
-
Once jars are all in the canner, adjust the water level so it is 2-inches over the tops of the jars. Cover the canner and bring to boil over medium-high heat.
-
Once the water boils vigorously, set a timer, and continue boiling the jars for 15 minutes at altitudes of less than 1,000 feet. Adjust processing time for your altitude if necessary (See Note).
-
When the processing time is complete, turn off the heat, and remove the cover by tilting the lid away from you so that steam does not burn your face. Let the canner cool down and settle for 5-minutes.
-
Spread a dry kitchen towel on the counter. Use the jar lifter to remove the jars from the canner and place them on the towel. Keep the jars upright, and don’t tighten bands or check the seals yet. Let the jars sit undisturbed for 12 to 24 hours to cool.
-
After 12 to 24 hours, check to be sure jar lids have sealed by pushing on the center of the cover. The lid should not pop up. If the top flexes up and down, it did not seal. Refrigerate jar and use up within several weeks.
-
Remove the screw-on bands and wash the jars. Label and date the jars. Store in a cool, dark location. Allow 4 to 5 weeks before opening for the pickling brine to infuse and develop flavor.
-
Use home canned jars within 12 to 18 months for the best flavor. The recipe makes about 6-pint jars of pickled green tomatoes.
Notes
All times are at altitudes of less than 1,000 ft. Adjustments must be made for altitudes greater than 1,000 ft. Processing time for altitudes of 1,001 – 6,000 ft is 20 minutes, and above 6,000 feet is 25 minutes.
I am happy to answer any questions, but if you need immediate canning help or answers, don’t hesitate to contact your local extension office.
Nutrition
Serving: 1oz | Calories: 15kcal
Turn those unripe tomatoes into something delicious. With this canning recipe, you can easily preserve pickled green tomatoes. So next time you have unripe tomatoes, don’t let them go to waste – pickle them!
You May Also Like:
Good planning is key to a successful vegetable garden
Whether you are new to growing your own food or have been growing a vegetable garden for years, you will benefit from some planning each year. You will find everything you need to organize and plan your vegetable garden in my PDF eBook, Grow a Good Life Guide to Planning Your Vegetable Garden.

[ad_2]
