[ad_1]
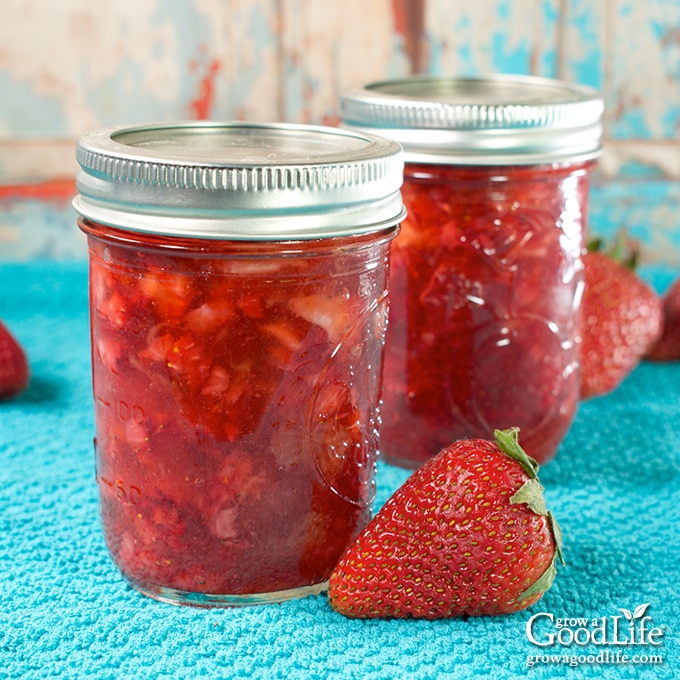
Indulge in the vibrant flavors of homemade strawberry jam with our irresistible low-sugar strawberry jam recipe. Bursting with the natural sweetness of ripe strawberries, this delightful preserve is perfect for spreading on toast, enhancing your favorite desserts, or gifting to loved ones.
Our easy-to-follow canning method ensures long-lasting freshness, allowing you to enjoy the taste of summer’s finest strawberries all year round. So get ready to savor the essence of homemade goodness with our mouthwatering strawberry jam recipe.
Strawberry season is a fleeting delight, with these juicy berries gracing us with their presence for a short time each year. Whether you grow your own strawberries or visit a local pick-your-own farm, don’t let your bountiful harvest go to waste.
Our low-sugar strawberry jam recipe is the perfect solution, preserving their vibrant flavor long after the season ends. Using less sugar allows the true taste of the strawberries to take the spotlight.
With this canning recipe, you’ll capture the essence of ripe berries in a versatile, shelf-stable jam that you can enjoy throughout the year. Let’s dive into the process of creating a homemade strawberry jam that will elevate your breakfasts, snacks, and desserts to a whole new level of fruity goodness.
About the Ingredients
Before we begin, let’s dive into each ingredient and uncover how these simple elements come together to create jars of homemade jam.
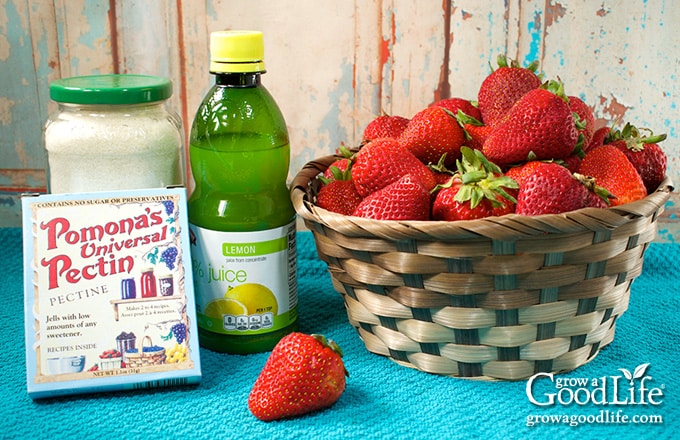
Strawberries
Selecting fresh strawberries at their peak is crucial for making the best strawberry jam. Look for strawberries that are firm, plump, and vibrant in color. Ripe strawberries will have a sweet aroma and should be free from any signs of decay or damage. Avoid strawberries that are mushy, bruised, or have moldy spots.
You can also use frozen strawberries instead of fresh ones. This is particularly convenient when fresh strawberries are out of season or unavailable. To use frozen strawberries, take them out of the freezer a day ahead and let them thaw in the fridge. Then proceed with the recipe as you would with fresh berries. Be sure to include all the liquid that is released during thawing.
Pomona’s Universal Pectin
This recipe calls for Pomona’s Universal Pectin, a citrus pectin that offers several advantages over typical boxed pectin. Unlike regular pectin, Pomona’s Universal Pectin works by using calcium powder to gel instead of relying on large amounts of sugar and extensively high cooking temperatures that may diminish the fruit’s flavor. This lets the natural fruit flavor shine through in your jellies and jams rather than the overwhelming sweetness of sugar.
Sweeteners
While this recipe includes sugar, the use of Pomona’s Universal Pectin opens up a world of possibilities for sweetening options. While the recipe suggests 3/4 cup of sugar, you can adjust the sweetness according to your preference. You can use up to 2 cups of sugar if desired. Taste the mixture after the pectin is dissolved. If it is not sweet enough, add more sugar, and boil for an additional minute while stirring.
For those looking for alternative sweeteners, consider substituting 1/2 to 1 cup of mild-flavored honey to make honey-sweetened strawberry jam. Additionally, you have the freedom to use other sweeteners that measure similarly to sugar or honey. Liquid sweeteners like agave or maple syrup are also viable options.
Lemon Juice
Lemon juice in this recipe is optional, but I highly recommend it. Lemon juice helps enhance the flavor of the strawberry jam. It also aids in preserving the vibrant red color. You can use fresh or bottled lemon juice, depending on what is readily available.

Steps for Making and Canning Strawberry Jam
If you are new to canning or want to brush up on your canning skills, first review the water bath canning tutorial at the National Center for Home Food Preservation website to help you feel more confident in the canning process.
Now, let’s get down to business! While a more detailed printable recipe with instructions awaits you at the bottom of this article, here are the general steps to create your very own homemade strawberry jam.
Step 1: Gather Your Kitchen Equipment
Before you begin making and canning your strawberry jam, organize your work area and gather all the necessary kitchen equipment. Here’s a list of what you’ll need:
- Water bath canner and canning rack
- 5 half-pint sized canning jars
- Canning lids and bands (new lids, bands can be reused)
- Canning tools: jar lifter, canning ladle, funnel, and bubble popper
- Small clear jar with a lid for the calcium water mixture
- Basic kitchen supplies: A large saucepot, prep bowls, paring knife, cutting board, measuring cups and spoons, a potato masher, large spoon, and plenty of clean kitchen towels that you won’t mind getting a little stained.
Don’t Have a Water Bath Canner? No need to worry if you don’t have a dedicated water bath canner on hand! You can still achieve excellent results using a large sauce pot. Just make sure that the pot is tall enough to fully cover the tops of the jars by a few inches, with at least two or more inches of space remaining to prevent boiling water from splashing out. To protect the jars from direct heat, place a rack at the bottom of the pot to elevate them. This will ensure they won’t break during the canning process.
Having all the necessary equipment at hand will ensure a smooth and efficient jam-making process. So, gather these items and get ready to create your homemade strawberry jam!
Step 2: Prepare the Canning Gear
Start by washing your jars, lids, bands, and canning tools in warm, soapy water. Rinse them well and set then aside to air dry until you are ready to use them.
Warm the jars before filling them to prevent breakage due to thermal shock. Place the jar rack into the water bath canner, set the clean jars upright on the rack, and add water to fill the pot covering the jars. Bring the canner to a simmer at 180˚F and let the jars heat for 10 minutes. Keep the jars hot until you’re ready to fill them.
Step 3: Prepare the Ingredients
Start by rinsing the strawberries thoroughly under clean running water. Then remove the hulls and crush the berries with the potato masher. Finally, measure 4 cups of the mashed strawberries.
In the Pomona’s pectin box, you will find two envelopes. One is the pectin and calcium powder. In a small bowl, combine 2 teaspoons Pomona’s pectin powder with your sugar (or other sweetener) ensuring they are well mixed.
Then, mix the calcium water by combining 1/2 teaspoon of calcium powder (from the small packet in the Pomona’s pectin box) with 1/2 cup of water in a jar with a lid. Shake the jar vigorously to combine the ingredients thoroughly. You will only need 2 teaspoons for this recipe. Store the remainder in the refrigerator for making jams and jellies in the future.
Step 4: Make the Strawberry Jam
In a large saucepan, combine 4 cups of mashed strawberries, lemon juice, and 2 teaspoons of the calcium water.
Bring the strawberry mixture to a boil over medium-high heat. Add the sugar/pectin mixture and stir to dissolve. Continue stirring until the jam returns to a full boil, about 1 to 2 minutes. Once it boils, remove the pan from the heat.
Step 5: Fill the Jars
Spread a dry kitchen towel on the counter. Use a jar lifter to carefully remove a jar from the canner and drain the water back into the pot. Place the warm jar on the towel. Keep the remaining jars in the canner to stay warm and ready for filling.
Using a canning funnel and ladle, carefully fill the jar with the prepared strawberry jam, leaving about 1/4-inch of headspace at the top. This allows room for expansion during the canning process. After filling the jar, run a bubble popper through the jar to release any trapped air bubbles.
Take a damp towel and wipe the rim of the jar to remove any residue or stickiness. A clean rim will help create a tight seal between the lid and the jar. Ensure the rim is clean and free from any food particles, as this can interfere with achieving a proper seal.
Center a lid on top of the jar, making sure it sits flat and aligned. Place a band over the cover and screw it on firmly until it is fingertip tight. Be careful not to over tighten, as this can prevent air from escaping during the canning process.
Return the filled jar to the canner. Repeat the same process with the remaining jars, filling them one by one.
Step 6: Process the Jars in the Water Bath Canner
Once all the jars are filled and placed back in the canner, adjust the water level to cover the jars by at least 2 inches.
Bring the canner to a full rolling boil over high heat. Once the canner boils vigorously, start your timer, and process the jars according to the recommended processing time specified in the recipe. Maintain a steady boil throughout the processing time.
After the processing time is complete, turn off the heat and let the jars settle, then carefully remove the jars from the canner using the jar lifter and place them on a kitchen towel or cooling rack. Keep the jars upright and don’t touch the lids or tighten the bands. It will take time for the jars to seal completely. Allow the jars to cool undisturbed for 12 to 24 hours.

Ways to Use Strawberry Jam
Here are some delicious ways to use strawberry jam:
- Spread it on toast or bagels: Enjoy the classic combination of a warm slice of toast or a freshly toasted bagel with a generous layer of strawberry jam.
- Make PB&J sandwiches: Elevate your peanut butter and jelly sandwich using strawberry jam for a fruity flavor.
- Top pancakes or waffles: Drizzle strawberry jam over a stack of fluffy pancakes or crispy waffles for a sweet and tangy twist.
- Swirl it into yogurt: Add a spoonful or two of strawberry jam to your favorite yogurt for a fruity and flavorful boost.
- Create fruity sauces: Combine strawberry jam with a splash of lemon juice or balsamic vinegar to make a delicious sauce that pairs well with roasted meats, grilled chicken, or even as a dressing for salads.
- Spoon over ice cream: Enjoy it as a sweet sauce over vanilla ice cream, adding a fruity and refreshing element to your dessert indulgence.
- Mix into smoothies: Blend strawberry jam into your favorite smoothie recipe for a burst of sweetness and a touch of natural fruit flavor.
- Gift it: Jar up your homemade strawberry jam and give it as a thoughtful and delicious gift to friends, family, or neighbors.
Low Sugar Strawberry Jam Recipe
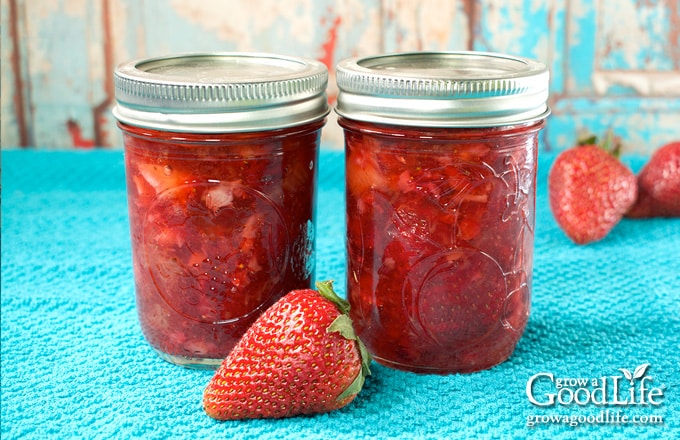
Preserve the vibrant flavors of fresh strawberries with this simple and low sugar strawberry jam recipe. Perfect for breakfast spreads and delightful desserts.
Ingredients
- 4 cups mashed strawberries about 2 1/4 pounds of strawberries
- 1 package Pomona’s Universal Pectin
- 3/4 cups sugar or 1/2 cup honey
- 1/2 cup water
- 2 tablespoons lemon juice optional. freshly squeezed or bottled juice.
- 1 fdfdd
- 1 fdfdfdf
Instructions
Prepare the Canning Equipment:
-
Wash your jars, lids, and canning tools in hot soapy water. Rinse thoroughly to remove all suds. Set aside to air dry on a clean kitchen towel.
-
Place the jar rack into the water bath canner, set the jars on the rack, and add water to cover the jars.
-
Bring the canner to a simmer (180˚F) over medium heat, warm the jars for 10 minutes, and then keep them warm until you are ready to fill them.
Prepare the Ingredients:
-
Rinse the strawberries well under clean running water. Remove the hulls and mash the berries. Measure 4 cups of mashed strawberries. Set aside.
-
Add the sugar (or honey) and 2 teaspoons Pomona’s pectin powder in a small bowl. Mix well to combine and set aside.
-
Prepare your calcium water by combining 1/2 teaspoon calcium powder (from the small packet in the Pomona’s pectin box) with 1/2 cup water in a jar with a lid. Shake well to mix.
Make the Strawberry Jam:
-
In a large saucepan, combine the mashed strawberries, lemon juice, and 2 teaspoons of the prepared calcium water.
-
Bring the strawberry mixture to a boil over medium-high heat. Add the sugar mixture and stir to dissolve. Continue stirring until the jam returns to a full boil, about 1 to 2 minutes. Once it boils, remove the pan from the heat.
Fill the Jars:
-
Spread a kitchen towel on the counter. Remove a jar from the canner using the jar lifter. Drain the water back into the canner and place on the towel.
-
Use your canning ladle and funnel to fill the jar leaving 1/4-inch headspace at the top.
-
Swirl the bubble popper through the jar to release air bubbles, and wipe the rim with a clean, damp towel.
-
Center a lid on the jar, and screw on a band until it is fingertip tight. Use the jar lifter to place the jar back into the canner, and repeat with the remaining jars.
Can the Jam:
-
Once all the jars are in the canner, adjust the water level to be two inches above the jar tops.
-
Cover the canner and bring it to a boil over high heat. Once the water boils vigorously, continue boiling for 10 minutes at altitudes of less than 1,000 feet. Adjust processing time for your altitude if necessary (See Notes).
-
When the processing time is complete, turn off the heat, and let the canner cool down and settle for about 5 minutes.
-
Spread a dry kitchen towel on the counter. Remove the cover by tilting the lid away from you so that steam does not burn your face.
-
Use the jar lifter to remove the jars from the canner and place them on the towel. Keep the jars upright, and don’t tighten bands or check the seals yet. Let sit undisturbed for 12 to 24 hours to cool.
-
After 12 to 24 hours, check to be sure the jar lids have sealed by pushing on the center of the cover. The lid should not pop up. If the top flexes up and down, it did not seal. Refrigerate the jar and use it up within 2 weeks.
-
Remove the screw-on bands and wash the jars. Label, date, and store your jars in a cool, dark place. Use within 12 to 18 months for the best flavor. Refrigerate your jam once opened and consume it within 2 weeks—yields about 4 to 5 half-pint jars.
Notes
Recipe adapted from Preserving with Pomona’s Pectin by Allison Carroll Duffy.
All times are at altitudes of less than 1,000 ft above sea level. Adjustments must be made for altitudes greater than 1,000 ft. For altitudes of 1,001–6,000 feet = 15 minutes, and above 6,001 feet = 20 minutes.
Nutrition
Serving: 2tablespoons | Calories: 30kcal
This recipe for making and canning strawberry jam is a delightful way to preserve the vibrant flavors of fresh strawberries. With its low sugar content and the use of Pomona’s Universal Pectin, the natural sweetness and essence of the fruit shine through without overpowering sweetness.
Whether you’re spreading it on toast, swirling it in yogurt, or enjoying it in your favorite desserts, this homemade strawberry jam is a true taste of summer that can be enjoyed all year round. Get ready to savor the goodness of homemade preserves and elevate your meals with this easy and delicious strawberry jam recipe.
Good planning is key to a successful vegetable garden
Whether you are new to growing your own food or have been growing a vegetable garden for years, you will benefit from some planning each year. You will find everything you need to organize and plan your vegetable garden in my PDF eBook, Grow a Good Life Guide to Planning Your Vegetable Garden.

[ad_2]
