[ad_1]
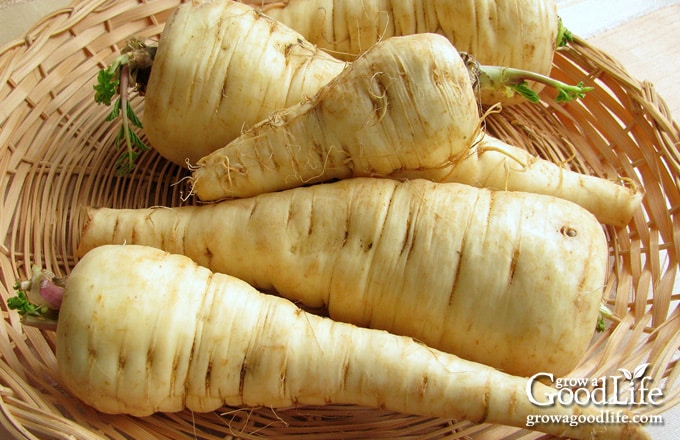
Learn how to grow parsnips successfully in your garden with these tips on planting, nurturing, and harvesting parsnips, along with preservation methods to enjoy the flavor year-round. Start your journey of growing parsnips today!
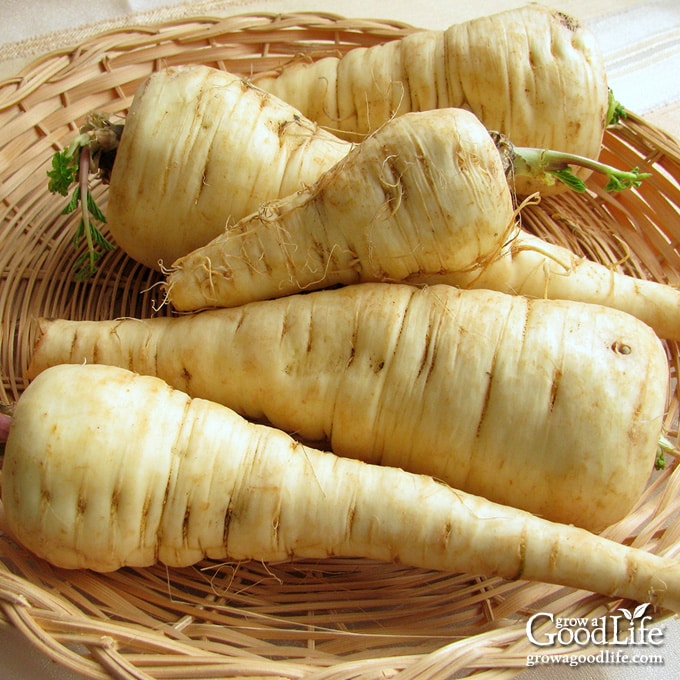
Are you ready to embark on a deliciously rewarding adventure in your garden? If you have a love for root vegetables and a bit of patience up your sleeve, growing parsnips is just the ticket! These humble yet versatile vegetables can add a touch of sweetness and earthiness to your culinary creations.
But be warned: growing parsnips requires a dash of determination and a sprinkle of planning. With their slow germination and long growing season, parsnips demand a bit more time and care than some other crops.
However, fear not! In this guide, we’ll walk you through the ins and outs of cultivating parsnips, sharing tips and tricks along the way. So grab your gardening gloves and let’s dig in, because with a little patience, you’ll soon be enjoying the homegrown goodness of your very own parsnips!
About Parsnips
Parsnips, often described as root vegetables resembling carrots, belong to the Apiaceae family, which also includes popular herbs like parsley and dill. These nutritious vegetables offer a range of health benefits and possess a distinctive flavor profile.
One notable characteristic of parsnips is their high fiber content, making them an excellent addition to a healthy diet. Additionally, they are a great source of essential vitamins and minerals, such as vitamin C and B6, which contribute to overall well-being. The natural sweetness of parsnips, combined with a subtle spicy undertone, sets them apart from their carrot counterparts.
Historically, parsnips played a significant role as a sweetener before the widespread availability of sugar cane. Early Europeans often used parsnips to add sweetness to their culinary creations. This root vegetable contains starch, which gradually converts to sugar after exposure to a few touches of frost. As a result, parsnips become even sweeter when cooked, enhancing their flavor and making them a versatile ingredient in various dishes.
Parsnips can lend a delightful taste to soups and stews, infusing them with a unique savory-sweet note. Furthermore, roasting parsnips brings out their inherent sweetness and creates a delicious caramelized flavor. The versatility of parsnips allows them to be incorporated into numerous recipes, adding depth and complexity to culinary creations.
Varieties to Consider Growing
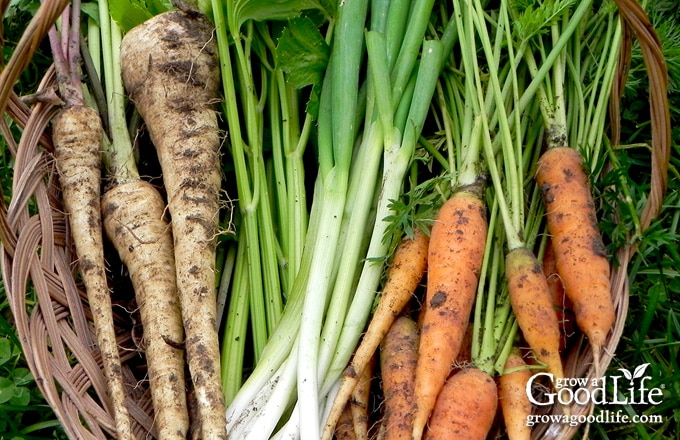
When considering growing parsnips, it’s helpful to explore different varieties to find the ones that best suit your needs and preferences. Here are several common parsnip varieties:
- All American is a parsnip variety well suited for various growing conditions, making it a popular choice among gardeners. It typically produces long, tapered roots with a creamy white color. All American parsnips offer a sweet and nutty flavor, making them a delightful addition to both cooked and raw dishes.
- Gladiator parsnips produce long and smooth roots, known for their excellent flavor. They are relatively easy to grow, canker resistant, and are appreciated for their consistent size and shape.
- Halblange parsnips are medium-length varieties. These parsnips are known for their slender, cylindrical shape and smooth skin. Halblange parsnips have a delicate, sweet flavor that intensifies after exposure to frost, enhancing their natural sweetness even further.
- Harris Model parsnips are a reliable and widely grown variety. They have a tapered shape, creamy white skin, and a sweet, nutty flavor. Harris Model parsnips are typically harvested at a mature size and are known for their storage ability.
- Hollow Crown parsnips are an old-fashioned heirloom variety known for their large, stout roots and sweet flavor. They are often favored for their reliable performance and resistance to disease.
- Lancer parsnips are known for their exceptional flavor and tenderness. They are typically medium to large in size, with a smooth, creamy exterior. Lancer parsnips have a slightly milder taste than other varieties, making them a versatile option for various culinary uses.
When choosing a parsnip variety, consider factors such as flavor preference, size requirements, and the maturity time that suits your gardening schedule. Experimenting with different varieties can add diversity to your harvest and provide an array of flavors to enjoy in your culinary creations.
Tips for Planting Parsnips
Growing parsnips requires specific considerations due to their unique characteristics and long growing season. Here are some tips to keep in mind when cultivating parsnips:
- Start with Fresh Seeds: When it comes to parsnips, it’s crucial to sow fresh seeds. Parsnip seeds do not store well, and if they are over a year old, their germination rate drops significantly. To ensure successful germination, purchase fresh parsnip seeds from a reputable source. By using fresh seeds, you avoid wasting valuable time waiting for seeds that may not germinate at all.
- Plan for a Long Growing Season: Parsnips have a significantly longer growing season than many other crops, ranging from 100 to 180 days to maturity. So plan accordingly, ensuring you have enough garden space and time to nurture the plants until harvest.
- Time your Planting: Parsnips thrive in cool weather. In the north, plan on sowing seeds in spring after the danger of heavy frost is past and harvest after the first frost in fall. In the south, sow seeds in the fall and harvest before the hot summer weather arrives.
Following these tips can improve your chances of growing healthy and flavorful parsnips.
Garden Site Selection and Soil Preparation
Choose a growing location that receives at least 6 to 8 hours of sun daily. Parsnips thrive in full sun, although they can tolerate partial shade. Select an area in your garden with loose, well-draining soil free of stones and other obstacles and a soil pH between 6.0 and 7.0. Avoid heavy clay soils that tend to retain excessive moisture that could cause the roots to rot.
Deep soil preparation is essential for parsnips since their taproots can grow up to 15 inches long. Before planting, prepare your garden bed by pushing aside last year’s mulch and removing weeds and plant debris. If your soil has poor drainage, consider amending it with organic matter, such as sifted compost, to improve its drainage capabilities.
Use a digging fork to gently loosen the soil deeply, allowing for better air circulation and water drainage. Be thorough in removing any stones, rocks, sticks, or other obstructions that could hinder the growth of the roots. Creating an obstacle-free environment will encourage straight and healthy root formation.
While nutrient-rich soil is essential, it’s important to strike a balance with fertilization. Avoid using fertilizers that contain high levels of nitrogen when growing parsnips. Excessive nitrogen promotes top growth at the expense of root development. Instead, choose a slow-release organic fertilizer with lower nitrogen content. Apply the fertilizer to the soil approximately two weeks before sowing parsnip seeds, allowing ample time for it to integrate evenly into the soil.
How to Direct Sow Seeds
Parsnips don’t transplant well, so sowing your seeds directly into the soil is best. To promote successful germination, ensure the soil temperature is at least 48˚F. Soil temperatures around 50 to 60˚F can accelerate seed germination.
Choose a sunny spot with well-draining soil free of stones and rocks. Parsnips thrive in loose soil, so take the time to prepare the bed as mentioned in the previous section. Follow these steps to ensure successful seed sowing:
- Select a sunny spot with well-draining soil free from stones and rocks.
- Sow seeds in sets of three or four, approximately 1/2 inch deep, spaced 2 to 3 inches apart, in rows spaced 18 to 24 inches apart. Not all seeds are likely to germinate, so planting extra help improve the odds of germination.
- Gently rake the soil over the seeds, avoiding excessive compaction.
- Water the seeds gently, ensuring the soil remains consistently moist for faster germination.
Parsnip seeds have a slow germination process and can take anywhere from 7 days to 3 weeks to emerge from the soil. Be patient during this period, ensuring the soil remains adequately moist.
Due to parsnips’ slow germination, you can interplant radishes between the sets of parsnips. Radishes have a quicker germination and growth rate, so you can harvest them well before the parsnips need the space. They also help break up the soil surface to help water penetrate more easily.
Caring for the Plants
Once your parsnip seedlings have emerged, proper care will ensure healthy growth and a successful harvest. Fortunately, parsnips are generally low-maintenance plants that require minimal attention. Here are some things to consider when caring for your parsnip plants:
Thinning
As the parsnip plants begin to grow, you will need to thin out the seedlings to provide sufficient space for each plant to thrive. Once the seedlings have developed a few sets of true leaves, thin them out so they are spaced about 3 to 6 inches apart, depending on the variety. This spacing allows enough room for the roots to develop properly and avoids overcrowding.
Watering
Parsnips require consistent moisture throughout their growing season to grow a strong, healthy taproot. Regular watering is important, especially during dry periods. The plants need about an inch of water per week through rainfall or supplemental irrigation. During the warmer months, when the soil is more likely to dry out, deep watering is beneficial to ensure the water reaches the root zone. Keep the soil consistently moist, but avoid overwatering to prevent waterlogging, which can lead to rot or disease.
Weeding
Once your parsnips germinate, their competition with weeds begins. Parsnips can take quite some time to grow, and during this time, weeds will compete with them for water, nutrients, and space.
Keeping weeds out of your parsnip bed is very important, especially in the first few weeks as the plants become established. Regularly remove any weeds that emerge, taking care not to disturb the delicate roots of the parsnip plants. Mulching the soil can also help suppress weed growth. Learn more tips for controlling weeds in the following article: Natural Weed Control in the Garden.
Mulching
When growing parsnips, using lightweight mulch can be beneficial in many ways. Parsnip seeds can take quite a while to germinate, and during this time they need to be protected from wind, rain, and pests until they establish roots. A lightweight, organic mulch (such as straw) can be applied to your parsnip patch to help keep your seeds safe until they germinate.
Applying a layer of organic mulch around your parsnip plants can provide several benefits. Using mulch when growing parsnips will also keep the soil moist, providing the perfect environment to help your parsnips thrive. In their first stages of life, parsnips are very susceptible to competing weeds. Mulching your parsnip bed can help keep it free of weeds while keeping the ground at an optimal temperature. Learn more about How Organic Mulch Helps Your Garden.
Hilling Soil to Reduce Greening
Greening can occur when the shoulders of the parsnip roots are exposed to direct sunlight. This can lead to a bitter taste and discoloration in the exposed portion of the root.
You can prevent greening by gently mounding soil around the base of the parsnip plants beginning when the foliage is about 8 to 10 inches tall. Create a loose mound of soil around the stem to provide coverage without burying the plants too deeply.
By reducing the exposure of the roots to sunlight, you can enjoy a higher quality harvest with roots that retain their natural sweetness and palatable appearance.
Fertilizing
While parsnips generally do not require heavy feeding, ensuring the soil is rich in nutrients at planting time is beneficial. Avoid fertilizers that are high in nitrogen, as they can promote excessive foliage growth at the expense of root development.
Incorporate a low nitrogen fertilizer into the soil about 2 weeks before planting parsnips. Sowing seeds too soon after fertilizing can harm the seeds and lead to a low germination rate.
Once your parsnip plants are established, they probably won’t need additional fertilizer. However, if you notice your plants are light green or seem stunted, they may benefit from a side dressing of a balanced or low-nitrogen organic fertilizer. Additionally, if you are using a lightweight organic mulch, it should break down over the growing season and help keep your parsnips fed.
Troubleshooting Pests and Diseases
Parsnips are typically resistant to most pests and diseases. Here are some common ones to look out for:
- Moles and Voles: These underground-dwelling creatures can tunnel and feed on the roots, leading to stunted or damaged plants. To deter moles and voles, you can plant your parsnips alongside plants that naturally repel them, such as daffodils or marigolds. Additionally, installing barriers like wire mesh or underground fencing can help protect the roots from these pests.
- Carrot Rust Fly: These pests lay their eggs near the base of the plants, and the larvae feed on the roots, causing damage and stunted growth. Use physical barriers such as row covers or insect netting to prevent adult carrot flies from laying eggs near the plants.
- Aphids: These small insects feed on the leaves and stems of parsnip plants, causing stunted growth and yellowing of foliage. Regularly inspect your plants for aphids and use insecticidal soap or a strong stream of water to control their population.
- Parsnip Canker: This fungus infects the roots of parsnip plants, developing cankerous lesions. The fungal spores can survive in the soil for several years, making crop rotation an important preventive measure. By selecting resistant varieties, you can minimize the risk of parsnip canker and ensure a successful harvest.
- Cavity Spot: This is a fungal disease that causes brown, sunken spots on the roots of parsnip plants. Ensure proper drainage and avoid overwatering to prevent the development of cavity spot. Rotate your crops yearly and remove any infected plants to prevent the spread of the disease.
- Powdery Mildew: This fungal disease appears as a white powdery coating on parsnip plants’ leaves, stems, and flowers. Provide adequate air circulation and avoid overhead watering to minimize the risk of powdery mildew. If necessary, apply fungicides labeled for powdery mildew control.
Regular monitoring, proper cultural practices, and prompt action at the first sign of pests or diseases can help maintain healthy parsnip plants and ensure a successful harvest.
Growing Parsnips in Containers
While parsnips are typically grown in garden beds, it is also possible to grow them in containers, making them a viable option for those with limited space or poor soil conditions. You can learn more about growing vegetables in containers in this article: Tips for Growing a Container Vegetable Garden.
Here are some guidelines for successfully growing parsnips in containers:
- Container Selection: Choose a large container at least 24 inches deep to accommodate the long taproot of parsnip plants. Opt for a container with a minimum diameter of 12 inches to provide enough space for the plants to grow. Ensure that the container has drainage holes to prevent soggy soil.
- Soil Mix: Fill the container with a well-draining potting mix that is loose and fertile. A mix containing equal parts of compost, garden soil, and perlite or vermiculite can provide the ideal growing medium for parsnips. Avoid heavy clay soils that may hinder root development.
- Sowing Seeds: Sow parsnip seeds directly into the container, following the same guidelines for planting depth and spacing as in garden beds. Plant the seeds about 1/2 inch deep and space them 3 to 6 inches apart, depending on the variety. Gently cover the seeds with soil and water the container thoroughly.
- Sunlight and Temperature: Place the container in a location that receives full sun or partial shade. Parsnips require at least 6 hours of sunlight per day for optimal growth.
- Watering: Provide consistent moisture to the container, keeping the soil evenly moist but not waterlogged. Check the moisture level regularly and adjust the watering frequency based on the weather conditions. Container-grown plants may require more frequent watering than those in garden beds.
- Container Maintenance: Regularly monitor the container for weeds and remove them promptly. Mulching the surface of the container with straw or wood chips can help conserve moisture and suppress weed growth.
Growing parsnips in containers requires a little more effort because you need to make sure they get enough water, sunlight, and regular care. However, the pest and disease pressure is reduced, increasing the likelihood you will be rewarded with a plentiful supply of fresh parsnips even with limited gardening space.
When and How to Harvest
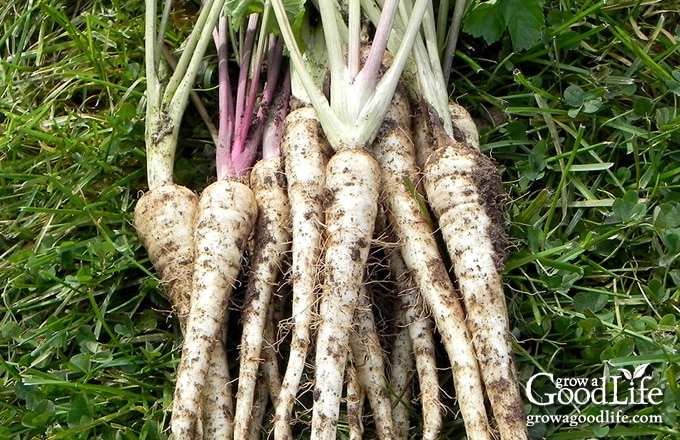
Parsnips can be harvested young when they have reached the desired size for your intended use or left to mature fully within 90 to 120 days. The exact timing can vary depending on your growing conditions and variety. You can determine if your parsnips are mature and ready to be harvested when the leaves start to dry out.
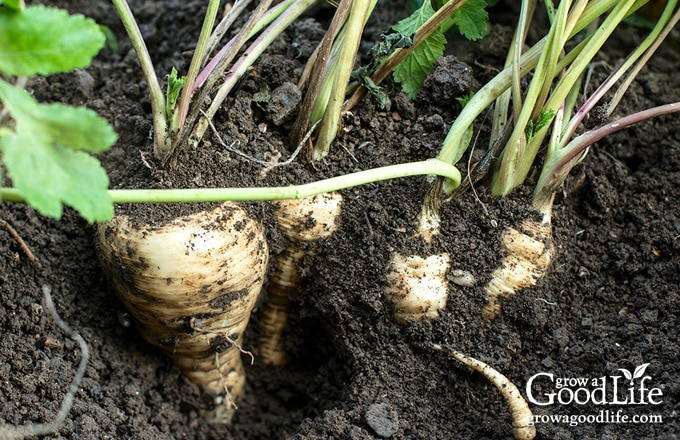
It’s worth noting that the flavor of parsnips can be enhanced by exposure to a few seasonal touches of frost. Cold temperatures convert the starch in parsnips into sugar, resulting in a stronger and sweeter flavor.
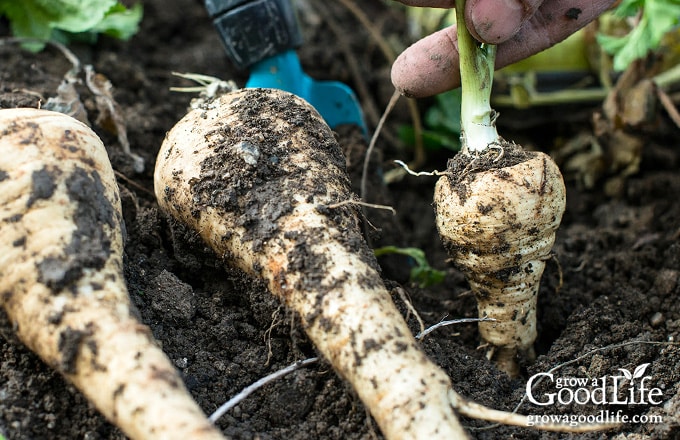
Before harvesting your parsnips, you can trim the leaves down to about an inch above the root. Then use a spade or garden fork to remove the parsnips from the ground. Dig around the root, hold on to the end, and gently lift it up and out of the soil. The roots should come up easily if your soil is loose and well-draining. If the soil is compact, carefully dig down several inches away from the plant so you don’t damage the root.
Preventing Parsnip Rash: Tips for Skin Protection
Parsnip foliage may cause skin irritation in some people, similar to poison ivy. Parsnip rash, also known as phytophotodermatitis, is a skin condition that can occur when the skin comes into contact with certain chemicals found in parsnips, particularly the compound called psoralen. When exposed to sunlight, the psoralen in parsnips can react with UV rays and cause a rash or skin irritation. Here are some tips to help prevent parsnip rash:
- Avoid direct contact: Consider wearing gloves, long sleeves, long pants, and closed-toe shoes to minimize direct contact between your skin and the plant sap when handling parsnips, especially the foliage. This can help reduce the risk of developing a rash.
- Wash thoroughly: After handling parsnips, wash your hands and any exposed skin with soap and water. This can help remove any plant residue or sap that may cause a reaction if exposed to sunlight.
- Avoid sun exposure: If you’ve had direct contact with parsnips, it’s best to avoid direct sunlight or UV exposure for at least 48 hours. This allows time for any photosensitizing compounds to dissipate from the skin and reduces the risk of a rash.
- Be cautious with wet skin: It’s important to note that the risk of parsnip rash is higher when the skin is wet. Therefore, avoid touching parsnips or foliage if your hands or skin are wet, as this can increase the likelihood of a reaction.
By following these preventive measures, you can minimize the risk of parsnip rash and enjoy working with parsnips without experiencing any skin irritation or discomfort.
Preserving Parsnips: Long-Term Storage Methods
When you have an abundance of parsnips and want to enjoy their flavors throughout the year, preserving them is a great option. Using various preservation methods, you can extend the shelf life of parsnips and have them readily available for your culinary needs. Here are some common methods for preserving parsnips:
Root Cellaring
One of the simplest ways to store parsnips is by utilizing a root cellar or a cool storage area. Under optimal conditions, they can last 3 to 5 months. You can learn more about root cellar food storage in this article: Crops for Winter Food Storage.
- Select mature parsnips for storing. Small, thin, and damaged roots won’t store well, so either use these up quickly, or preserve them by freezing.
- Prepare the parsnips by brushing off excess soil without washing them. Place them in boxes or crates filled with damp sand, sawdust, or wood shavings to maintain moisture.
- Store the containers in a location where the temperature is consistently between 32 to 40˚F (0 to 4˚C) and humidity is around 90%.
- Regularly check the parsnips for signs of spoilage.
Storing in the Ground
Another storing method is leaving parsnips in the ground over winter, covered with a thick layer of mulch. This approach, known as overwintering, works well in areas with mild winters.
Mulching protects the parsnips from freezing temperatures and allows you to harvest them as needed during the winter months. Just ensure the mulch layer is sufficient to insulate the roots and prevent them from freezing.
Even if the ground freezes, parsnips may remain frozen throughout the winter and be ready to harvest once the soil thaws in the spring.
Freezing
Blanching and freezing parsnips is a popular method that helps retain their freshness. You can follow this tutorial for freezing carrots:
- Start by washing, peeling, and cutting into desired shapes, such as slices, cubes, or sticks.
- Blanch in boiling water for 4 minutes, and then transfer to an ice bath to cool quickly.
- Drain and pat dry before placing them in freezer-safe containers or bags.
- Label, date, and store in the freezer, where they can stay good for up to 12 months.
Dehydrating
Drying parsnips involves removing their moisture content using a food dehydrator to make them suitable for storing in jars at room temperature.
- Begin by washing, peeling, and slicing the parsnips into 1/8-inch rounds or strips.
- Blanch in boiling water for 4 minutes, and then transfer to an ice bath to cool quickly.
- Drain, pat dry, and arrange the slices in a single layer on dehydrator trays.
- Follow the manufacturer’s instructions to dehydrate until they are crisp and brittle.
- Store in airtight containers or vacuum-sealed bags in a cool, dry place.
- When ready to use, rehydrate by soaking in water or adding directly to soups and stews.
By using these preservation methods, you can enjoy the flavors of parsnips well beyond their harvest season, adding their unique taste to your culinary creations throughout the year.
Recipes Using Parsnips
Parsnips are a versatile root vegetable that can be used in various delicious dishes. Here are some popular ways to use parsnips:
- Roasted Parsnips: Roasted parsnips make a flavorful and healthy side dish either alone or roasted with other root veggies. Slice parsnips into sticks or chunks, toss them with olive oil, salt, and your favorite herbs or spices, and roast them in the oven until they are golden and tender.
- Mashed Parsnips: Boil parsnips until they are soft, then mash them with butter, cream, or vegetable broth for a creamy and flavorful alternative to mashed potatoes. You can also add garlic or herbs to enhance the taste.
- Parsnip Fries: Cut parsnips into thin strips, toss them in olive oil, sprinkle with salt and pepper, and bake or air-fry until crispy. Parsnip fries are a nutritious and tasty alternative to traditional potato fries.
- Soups and Stews: Add sliced parsnips in your favorite soups and stews such as this turkey noodle soup or harvest hearty beef stew recipe.
—
While growing parsnips requires patience and planning, the results are well worth the wait. Remember that parsnips have a unique growing process, with slow germination and a long growing season. However, once you have mastered the art of germination and have provided the necessary care, growing parsnips becomes a matter of patiently watering and waiting for nature to work its magic.
You will soon be rewarded with this delicious root vegetable’s delightful flavors and versatility. So, take up the challenge, sow the seeds, and enjoy the satisfaction of cultivating your own bounty of parsnips—fresh, flavorful, and proudly nurtured from seed to plate.
Good planning is key to a successful vegetable garden
Whether you are new to growing your own food or have been growing a vegetable garden for years, you will benefit from some planning each year. You will find everything you need to organize and plan your vegetable garden in my PDF eBook, Grow a Good Life Guide to Planning Your Vegetable Garden.

[ad_2]
